First login / Create an account
- Open in your browser: https://spl.cloud/
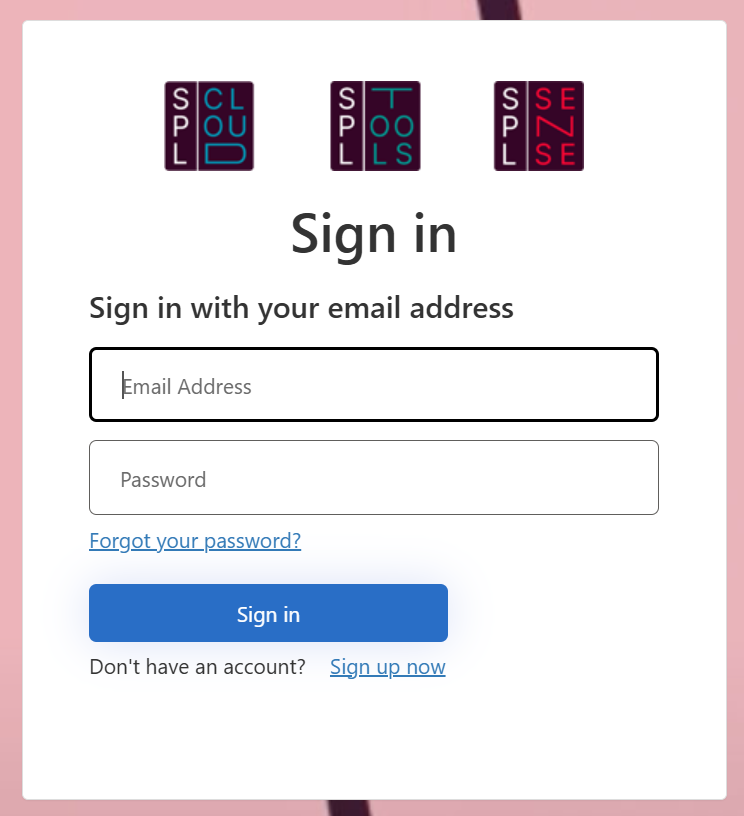
- If you already have an account: Log in with your email address and password.
- If you don’t have an account yet: Click on «Sign up now».
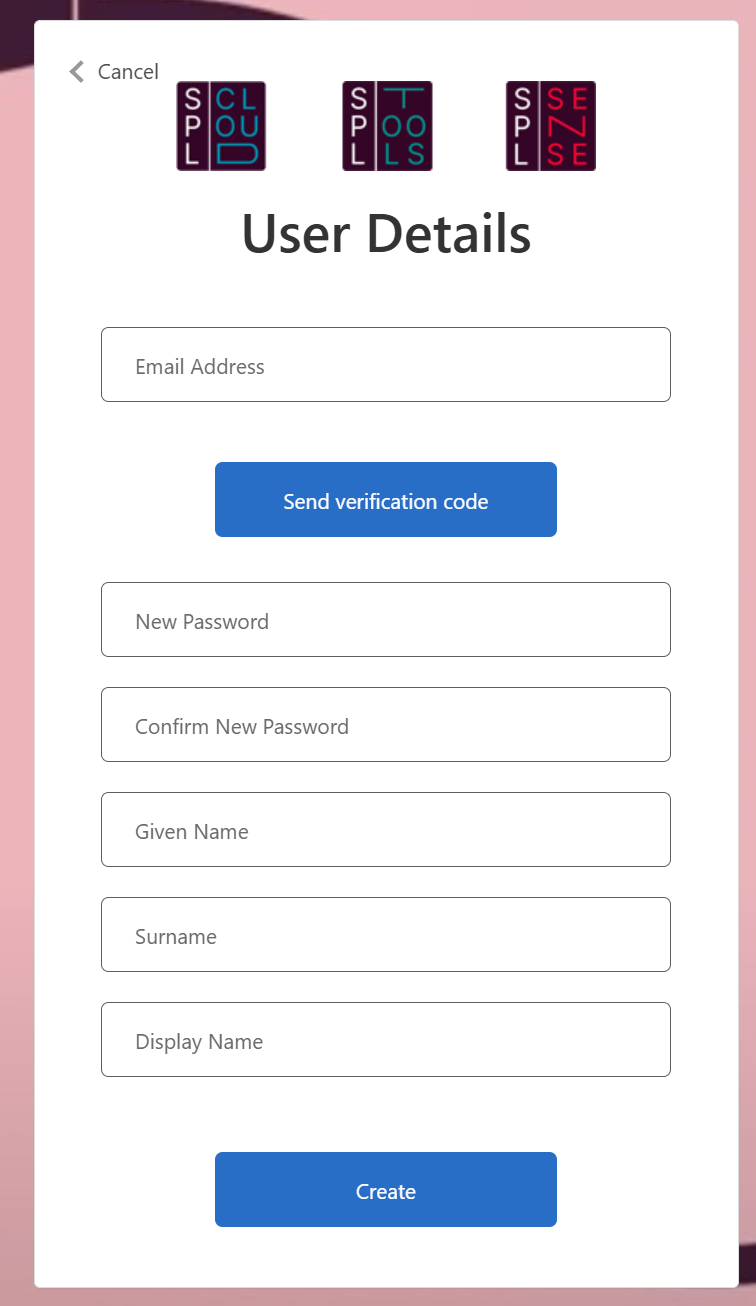
- Enter your email address: Enter your valid email address.
- Verify: Click on «Send verification code» and confirm the code you receive by email.
- Fill in the remaining fields such as password, first name, last name, and display name.
- Confirm: Click «Create» to confirm the creation of your account.
Dashboard overview
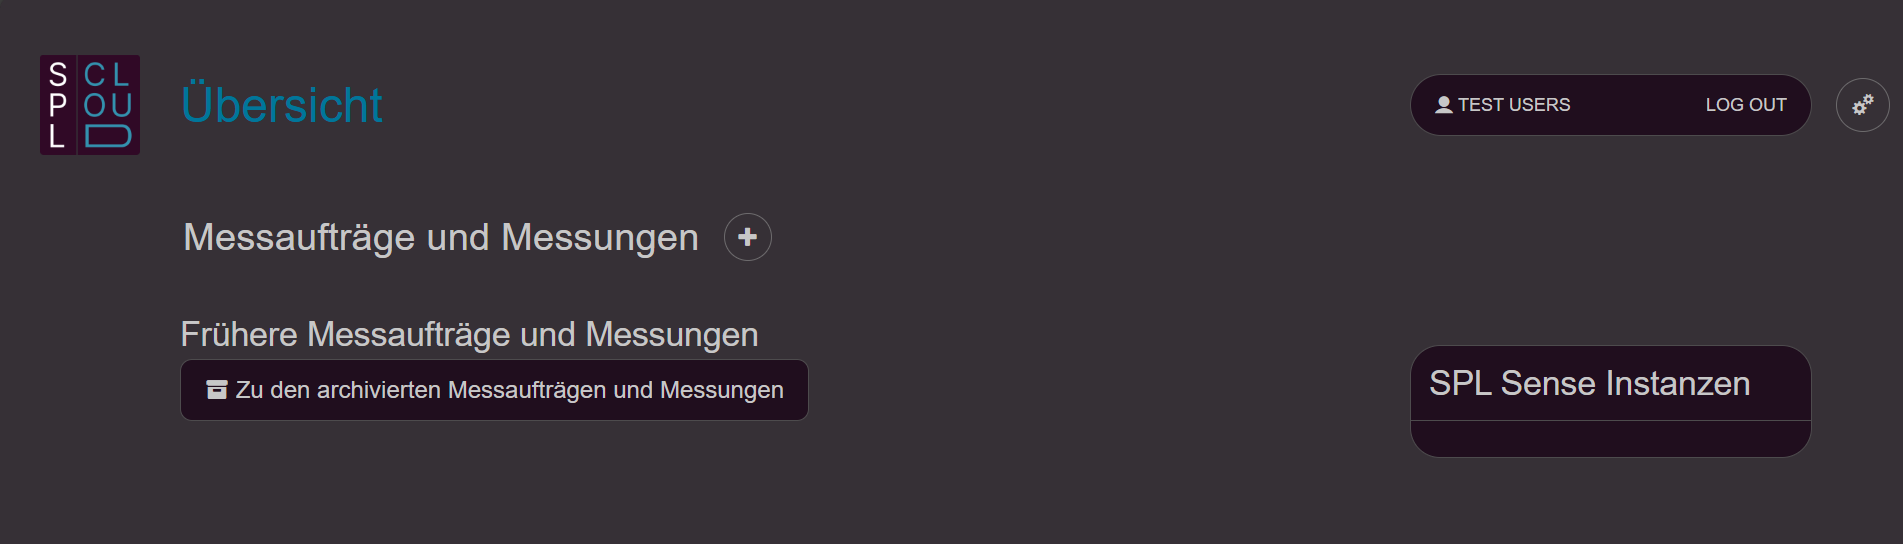
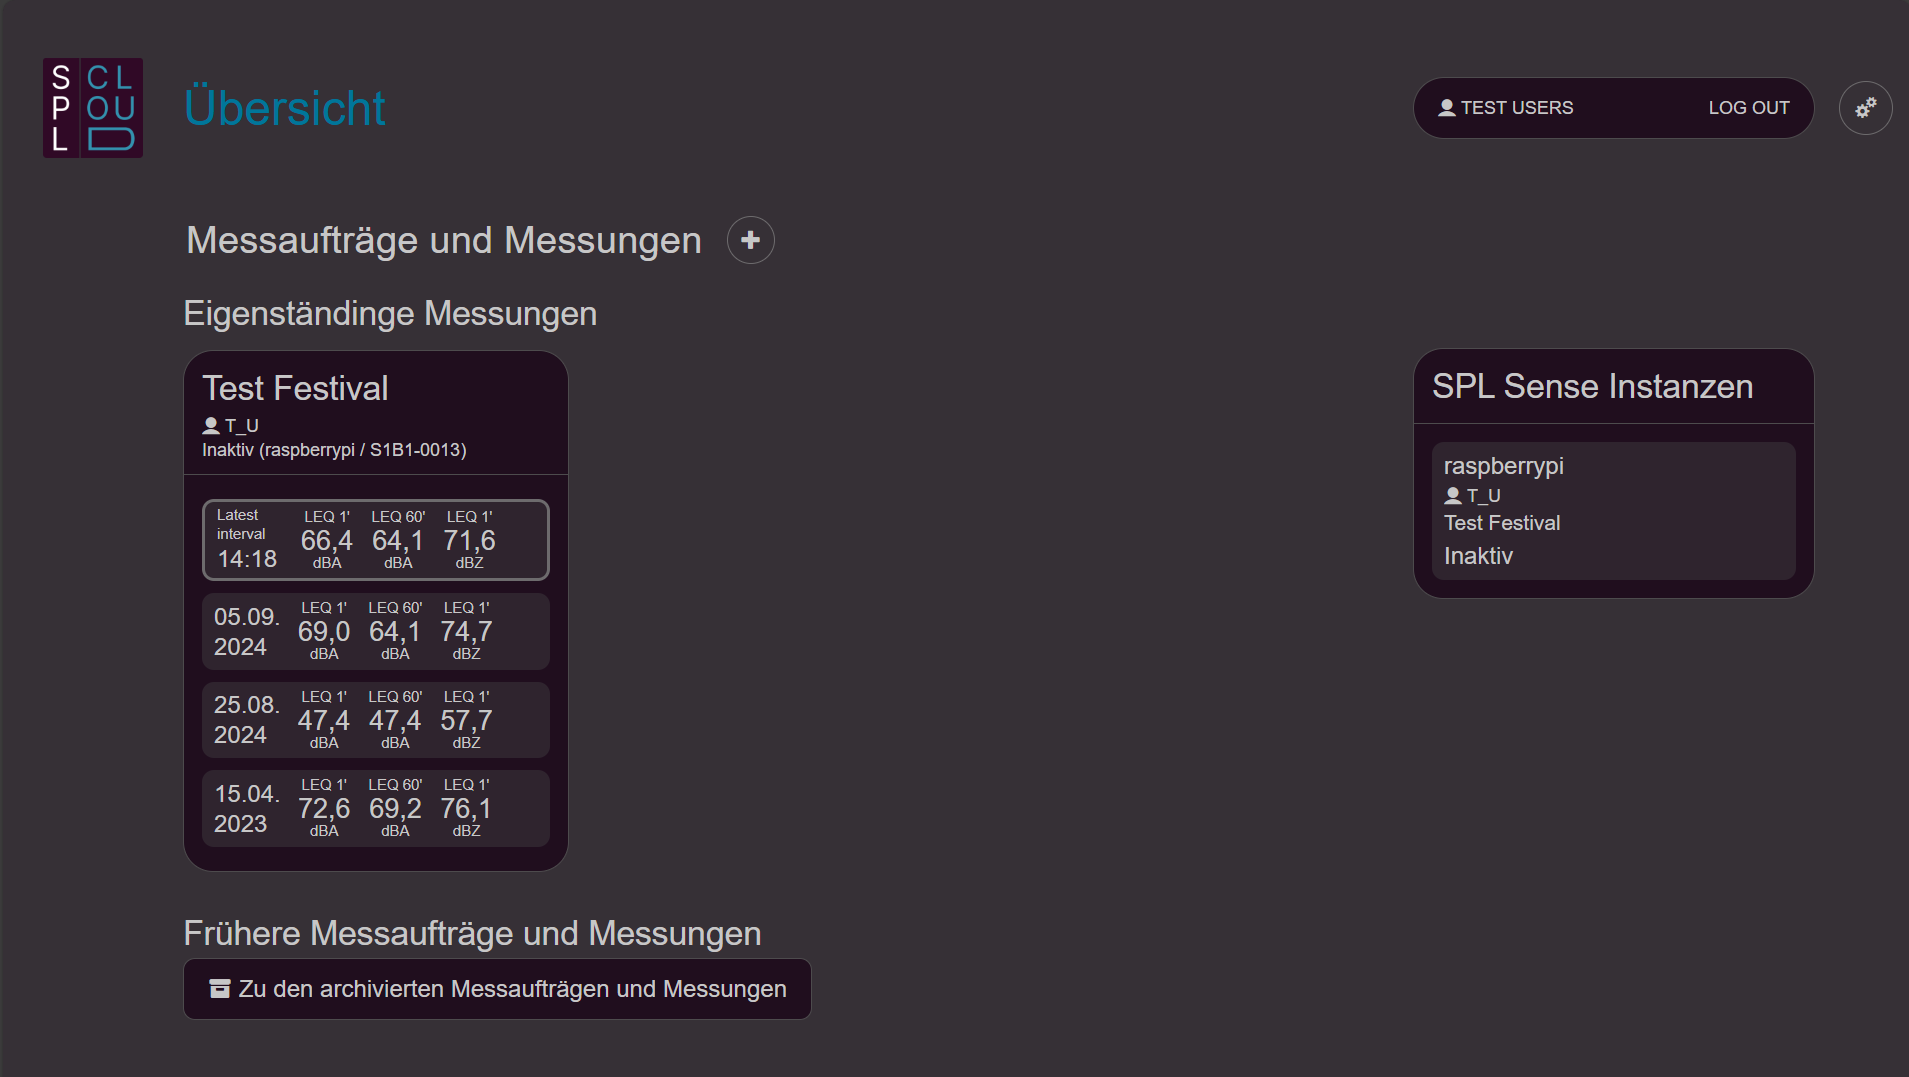
• Logo in the top left corner: Clicking the logo takes you back to the dashboard.
• Settings (gear icon, top right): Opens the settings.
• Create new measurement assignment: Click the «+» button next to “Measurement assignments and measurements” to create a new measurement assignment.
• View connected SPL Sense instances: Connected SPL Sense instances are displayed on the right side.
• Previous measurement assignments and measurements: This takes you to the archive of your measurements.
Settings
Via the gear icon in the top right you access the settings. Here you can adjust profile settings and manage organisations. An organisation can be your company or an event — a container in which people with different permissions can be represented.
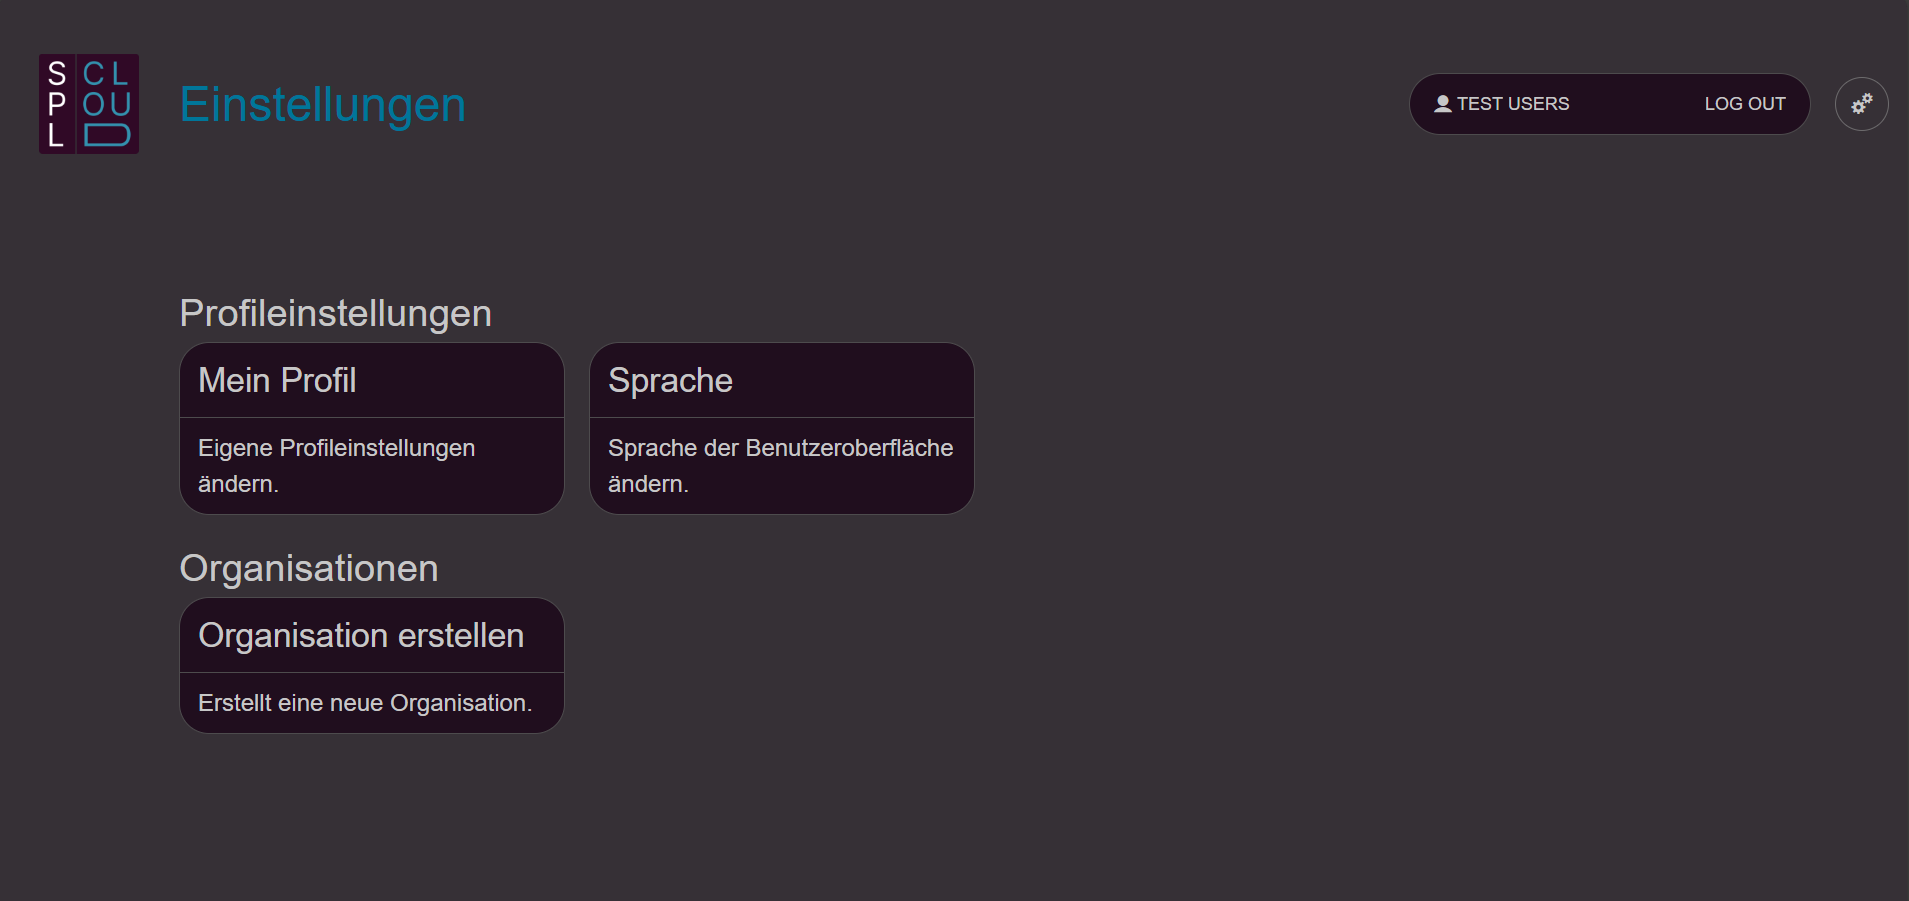
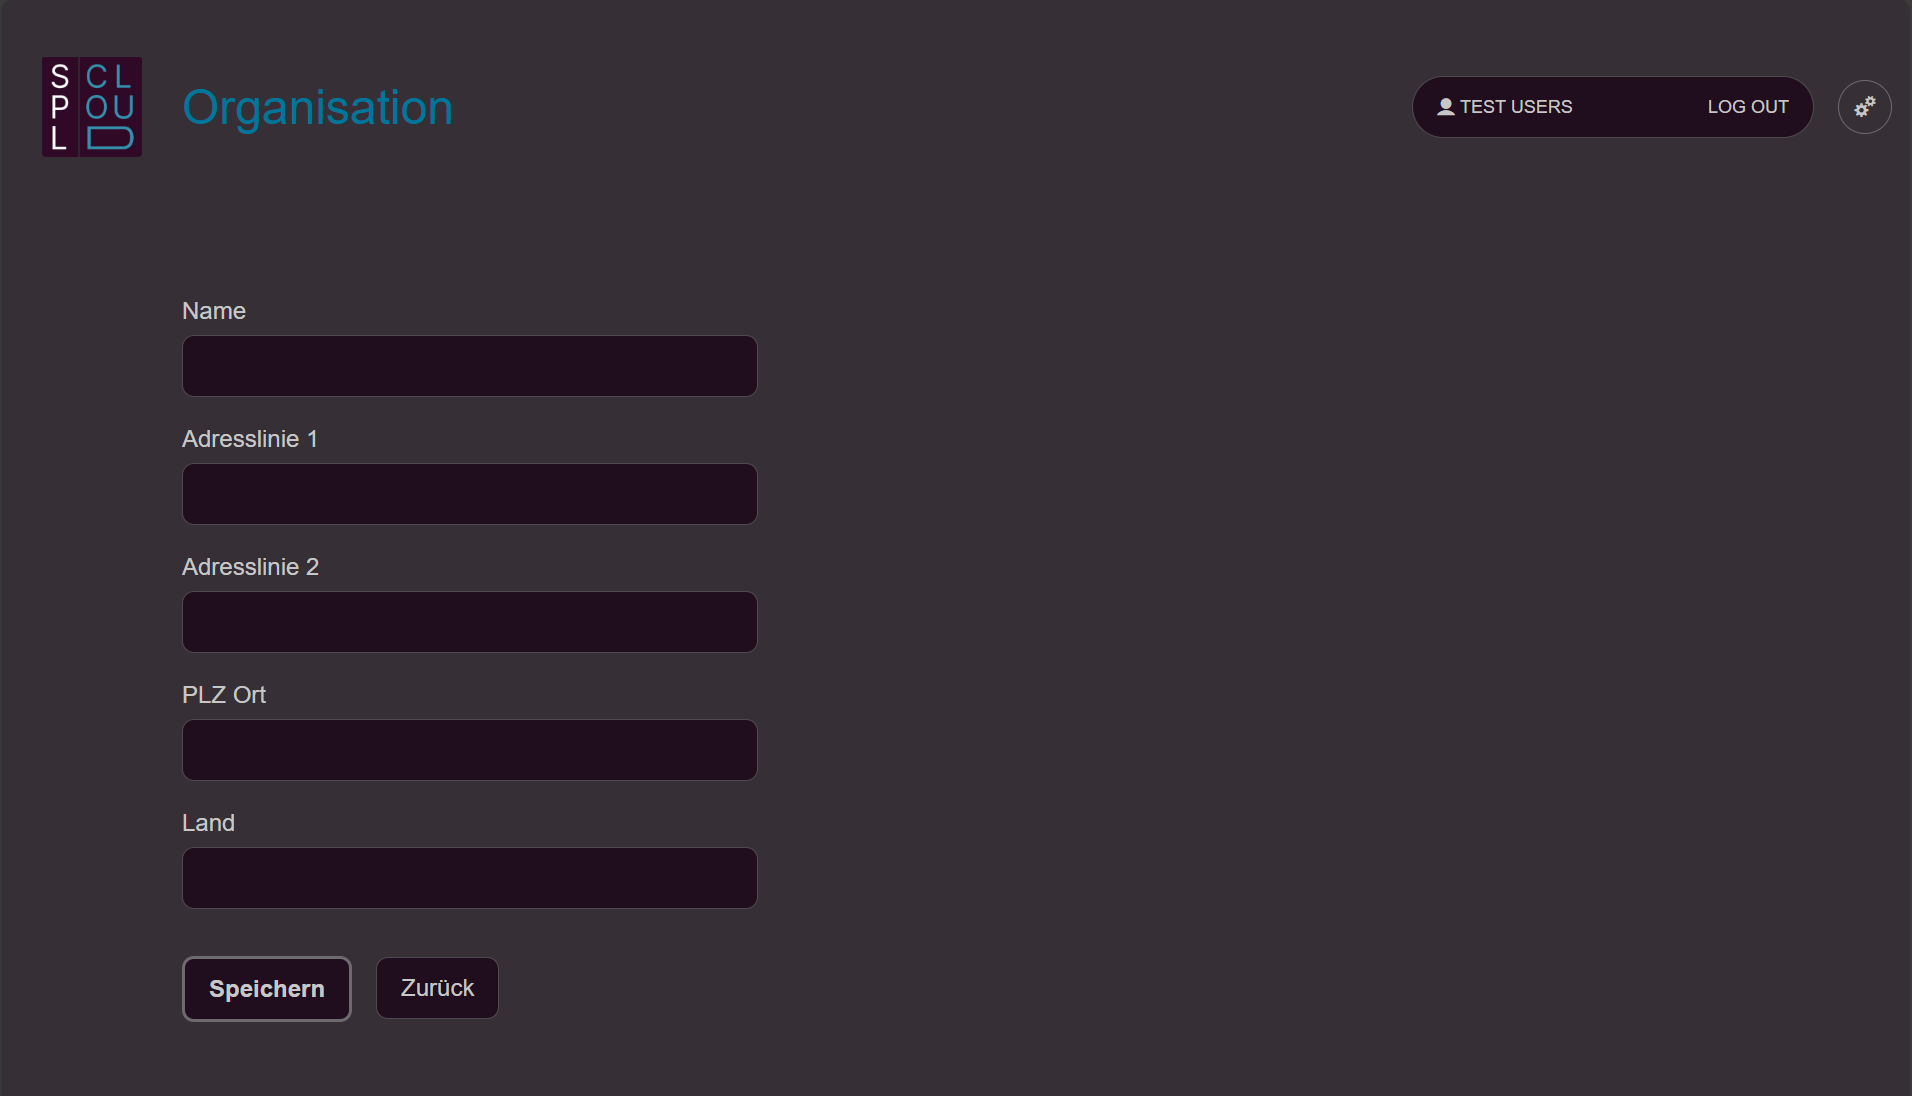
Create an organisation
- Create an organisation: Click on “Create organisation”.
- Details: Decide which details are relevant for you and fill them in.
After creation, you are automatically listed as a member with the role «Owner». Additional members can now be added. Note that those people must already be registered. - Add member: Select “Add member” to add further people.
- Enter email address: Enter the email address with which the person is registered on SPL Cloud.
- Confirm user: If the person (email address) exists, they will be suggested as «User found». Confirm the person with «Select».
- Assign role: Choose whether the person is a «Member» or «Owner». The difference is that Owners can additionally manage the people in the organisation.
- Edit member: If you want to remove a member from your organisation, select them and click «Remove member». You can also adjust a person’s role.
Connect SPL Sense to SPL Cloud
Every SPL Sense can be connected to the SPL Cloud to view and store data in real time. You will find the procedure in the SPL Sense quick start guide.
- Confirm registration: Once you have clicked the connection link or scanned the QR code in SPL Sense, you must confirm the registration of the SPL Sense instance.
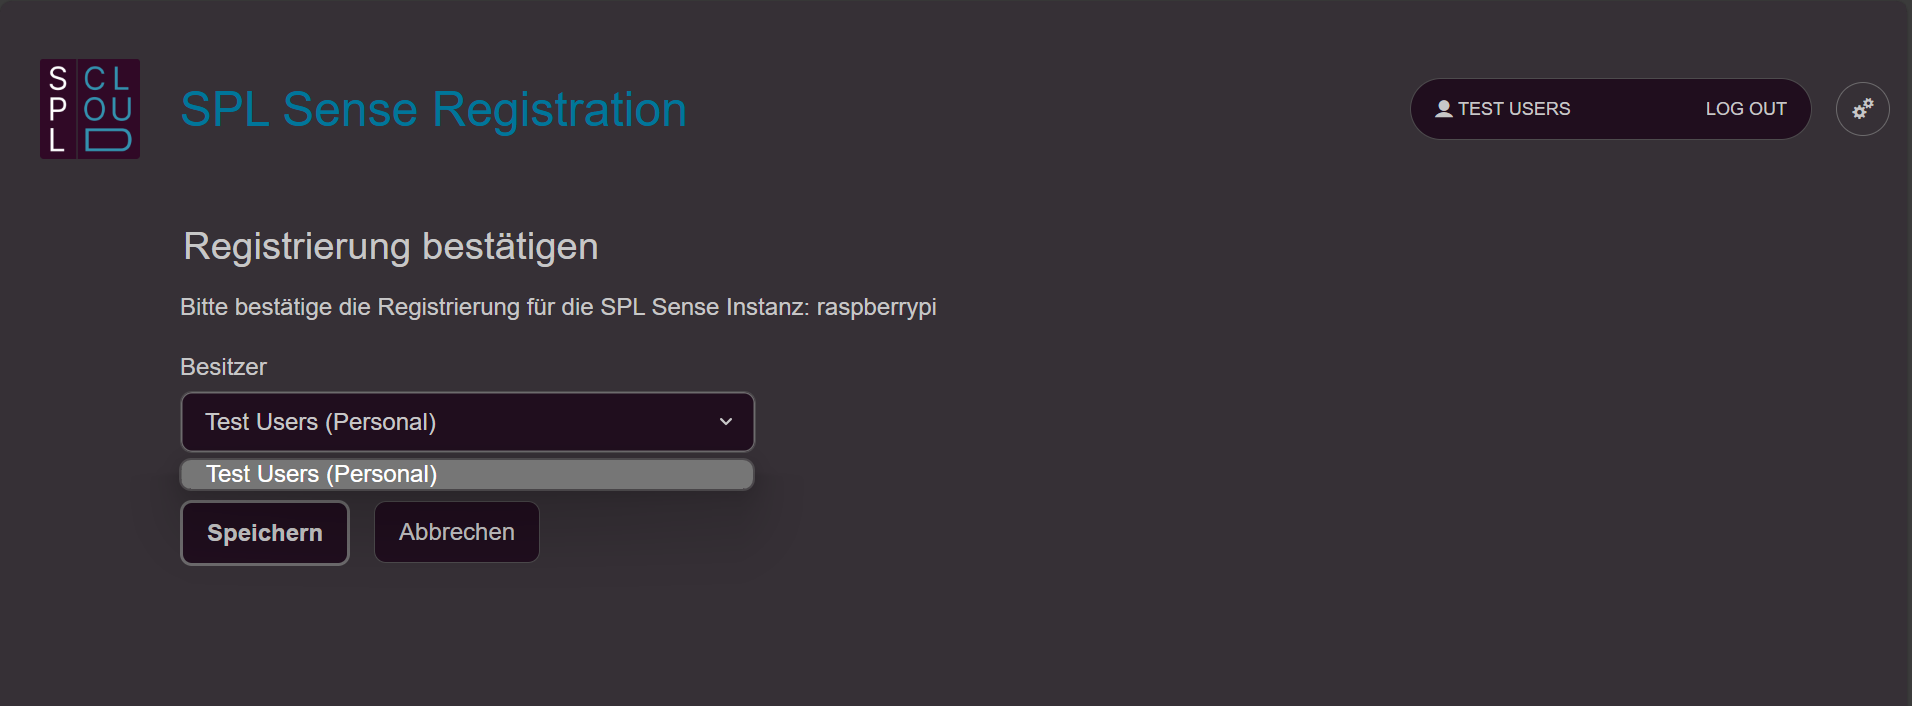
- Define owner: You can be a member of different organisations. You can therefore choose whether the measurement should belong to you personally or to an organisation you are a member of.
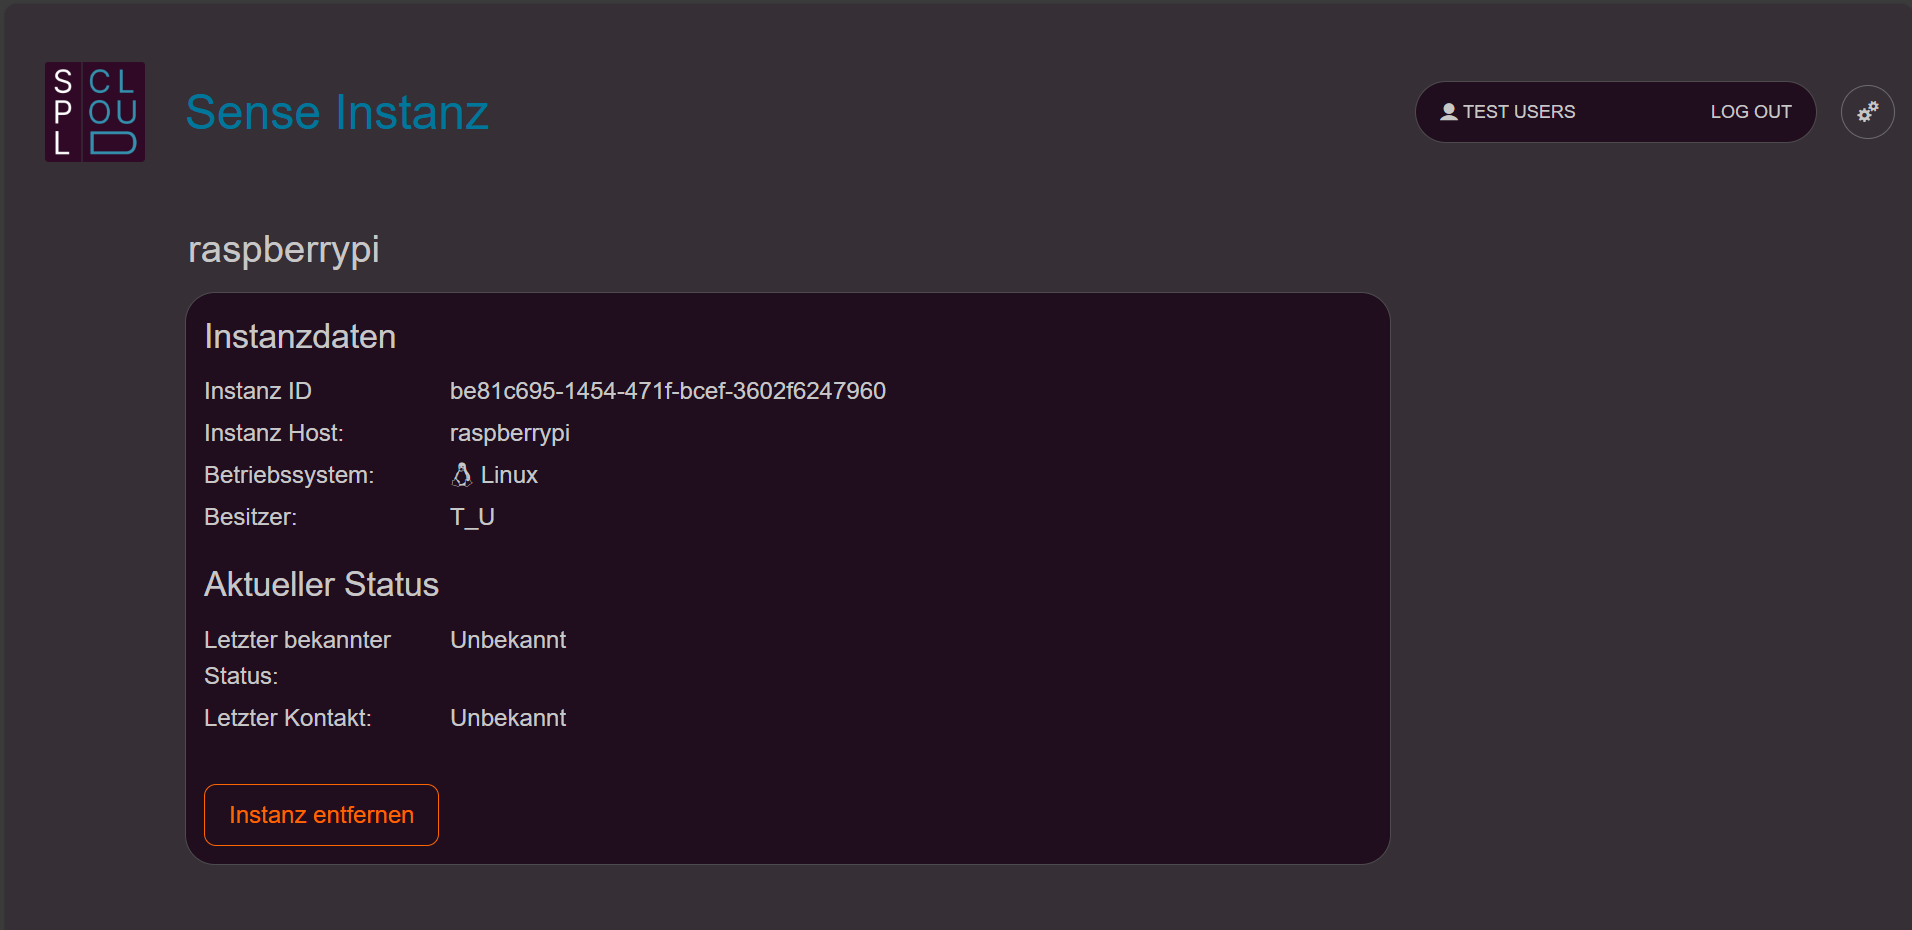
- Remove SPL Sense instance: You can disconnect from the cloud in SPL Sense (see SPL Sense guide) or manage the SPL Sense instances within your organisations.
Measurement assignments and measurements
If you have connected an SPL Sense instance to the SPL Cloud and a measurement on that SPL Sense has been enabled for the cloud, the measurement will appear as a «Standalone measurement» on the dashboard.
Create a measurement assignment
You can use the «+» button next to «Measurement assignments and measurements» to create a measurement assignment. A measurement assignment can contain and group one or more measurements.
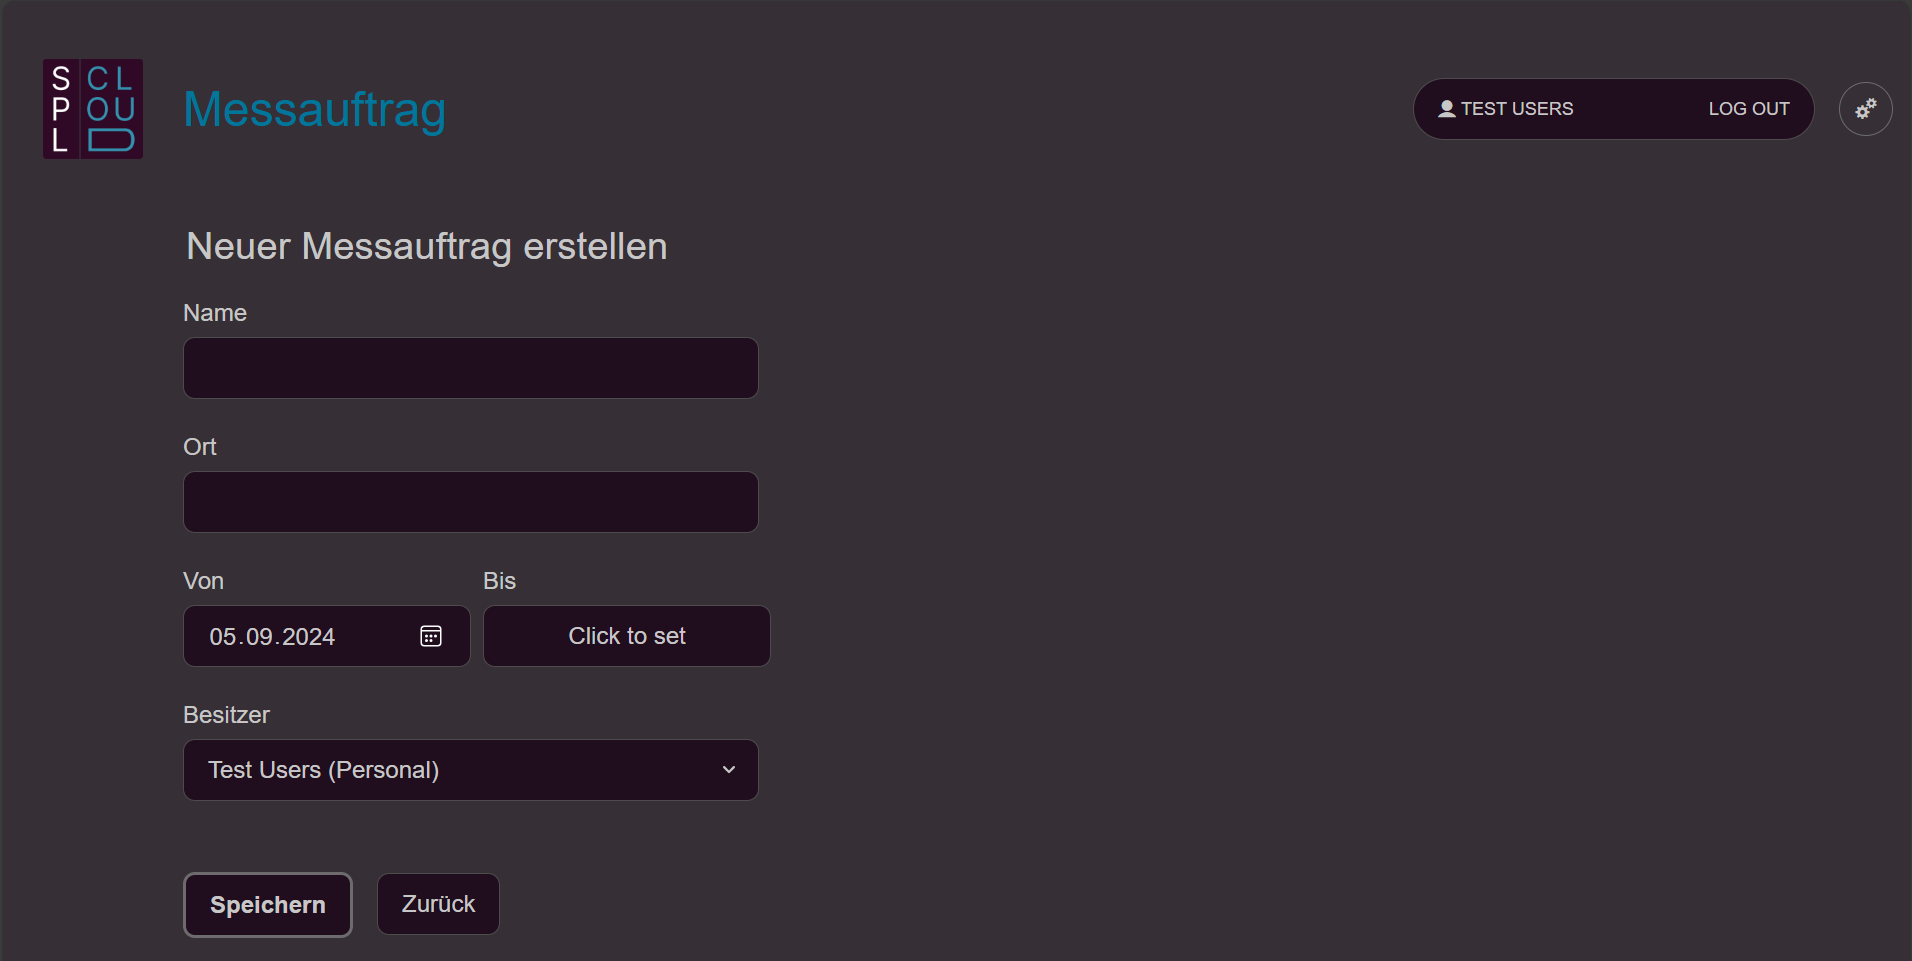
• Name: Enter the name of the festival, for example.
• Location: Optionally enter the venue here.
• From–To: Enter the duration of the measurement assignment. This date range is important so that the assignment appears in your current measurements or in the archive.
• Owner: Define whether the measurement assignment belongs to you or to an organisation you are a member of.
Edit a measurement assignment and add a measurement
By clicking the pencil icon next to a measurement assignment on the dashboard, you can edit its details and assign measurements to it.
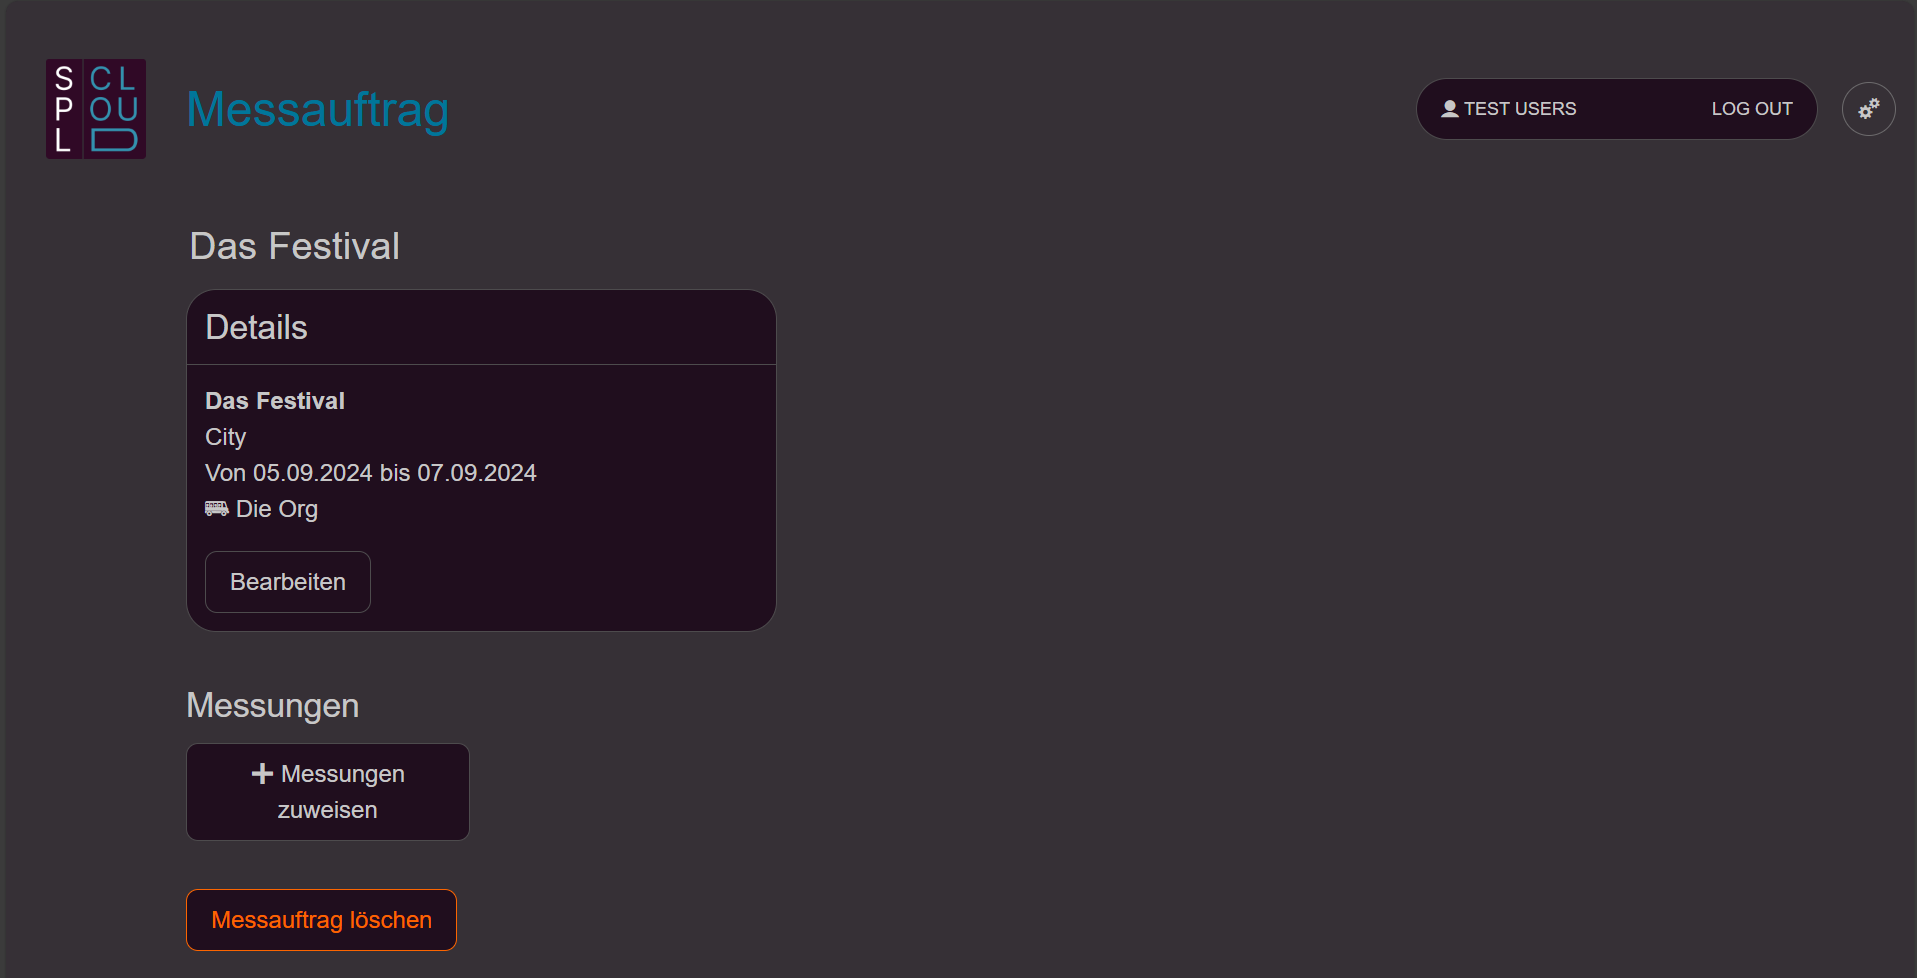
• Assign measurement: Under «Measurements», click «Assign measurements» and then select the desired measurement.
• Remove measurement: If you want to remove a measurement, click «Remove» next to the corresponding measurement. After assigning measurements, they will appear on the dashboard under the corresponding measurement assignment.
• Delete measurement assignment: You can remove a measurement assignment from the cloud using «Delete measurement assignment». This is only possible if there are no measurements in the assignment.
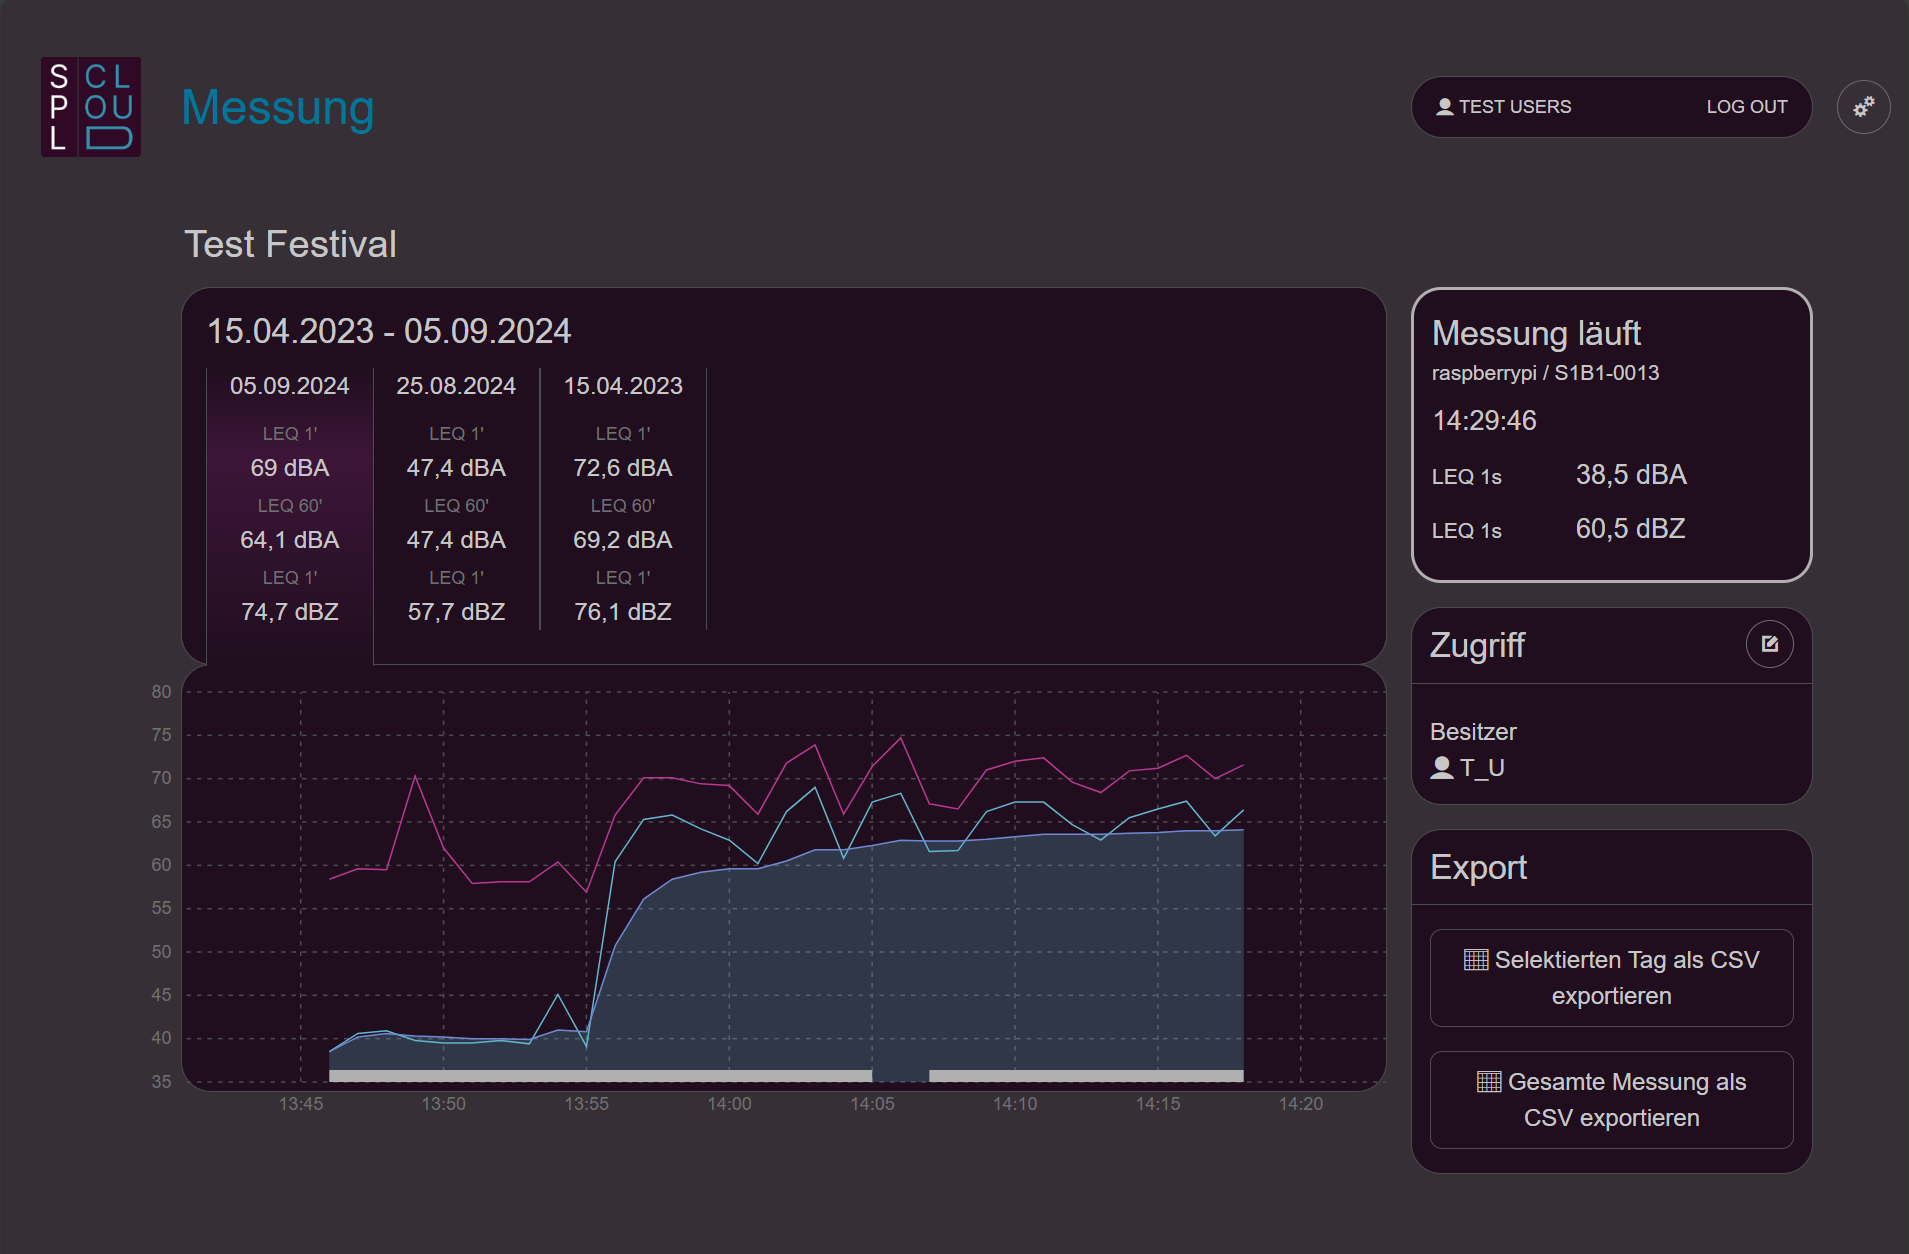
Measurement overview
When you click on a measurement in the dashboard, you see an overview comparable to SPL Sense. More information can be found in the SPL Sense quick start guide.
Access
It is possible to give other people — both registered and unregistered SPL Cloud users — access to measurements and measurement assignments.
- Open measurement: Click on a measurement in the dashboard. The current access permissions are displayed on the right side.
- Manage access: Select the icon in the top right corner of the «Access» section to create and manage access.
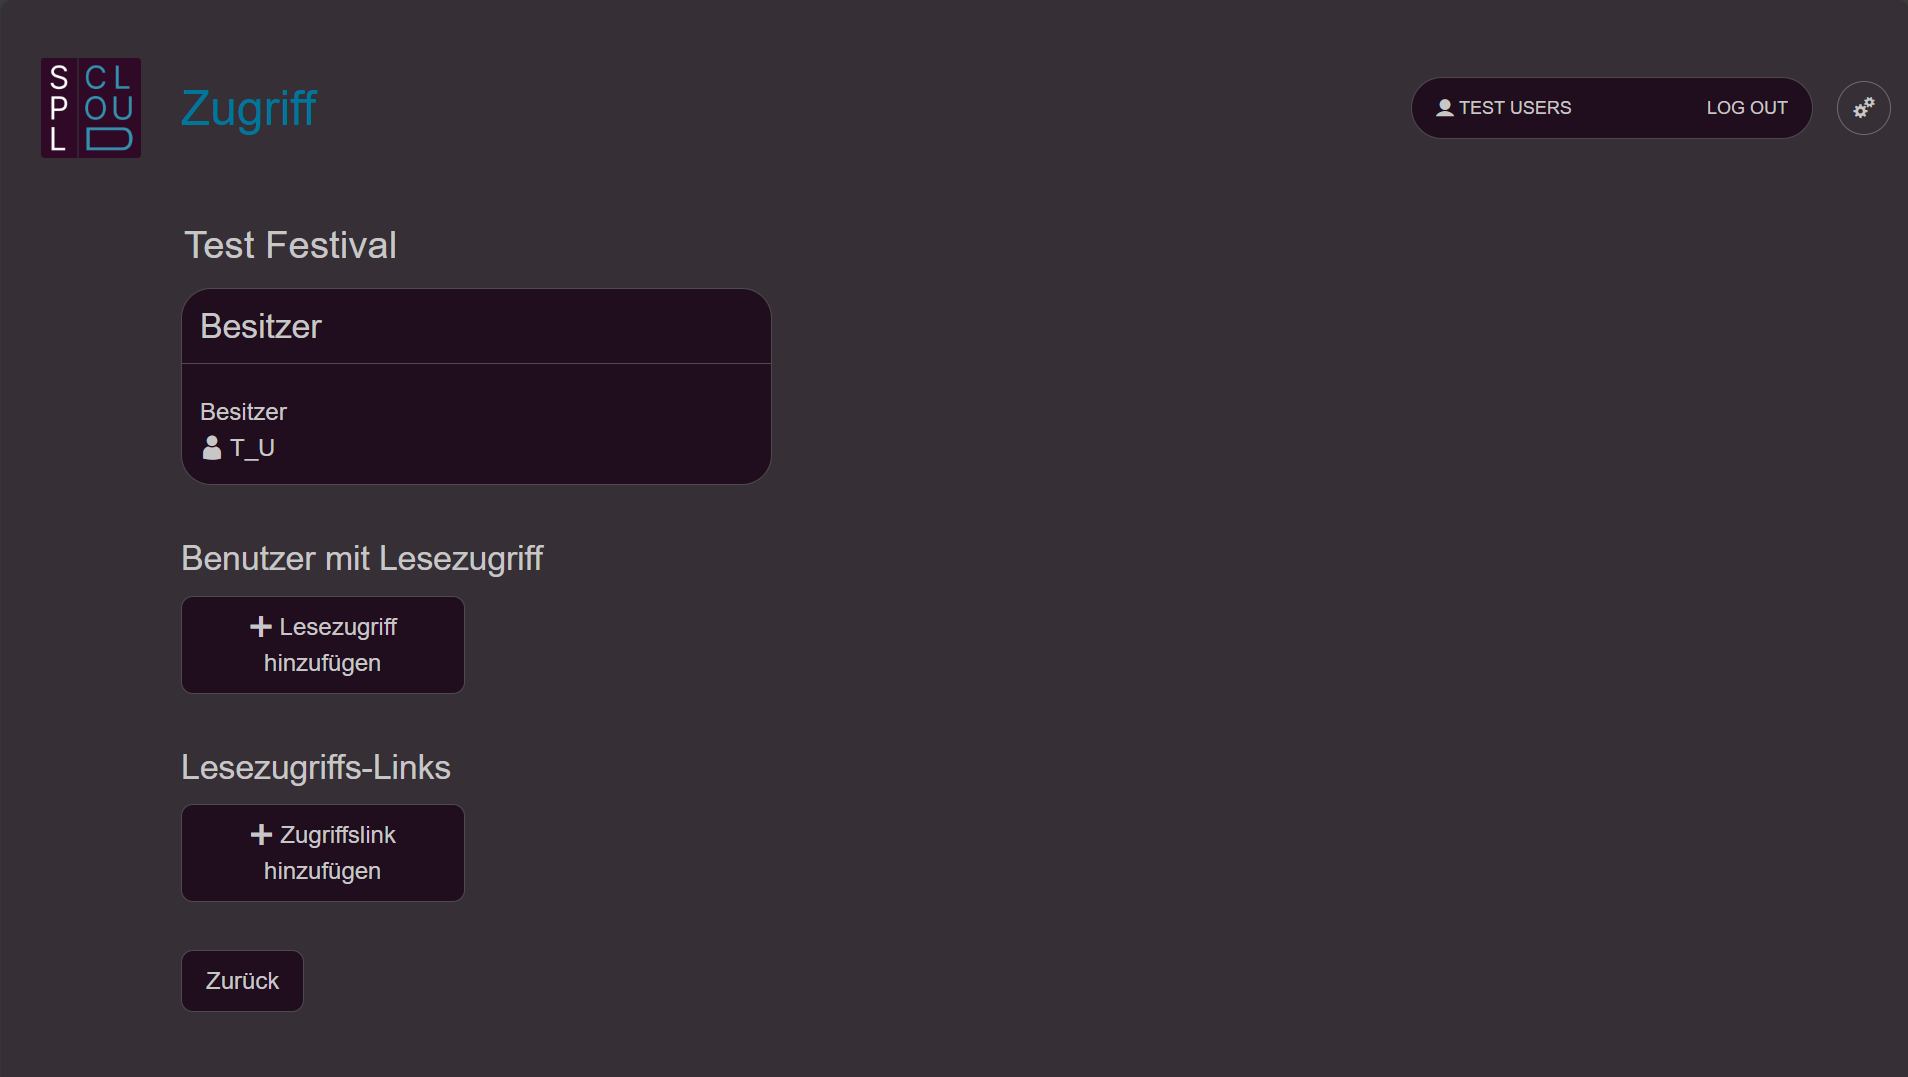
- Choose type of access: Select «Add read access» to grant read access to people registered on SPL Cloud. Select «Add access link» to grant access to people without registration.
- Add read access: Enter the person’s email address. If they are registered on SPL Cloud, they will be listed under «User found» and can be selected. You can then choose whether the person should have access to the individual measurement or the entire measurement assignment.
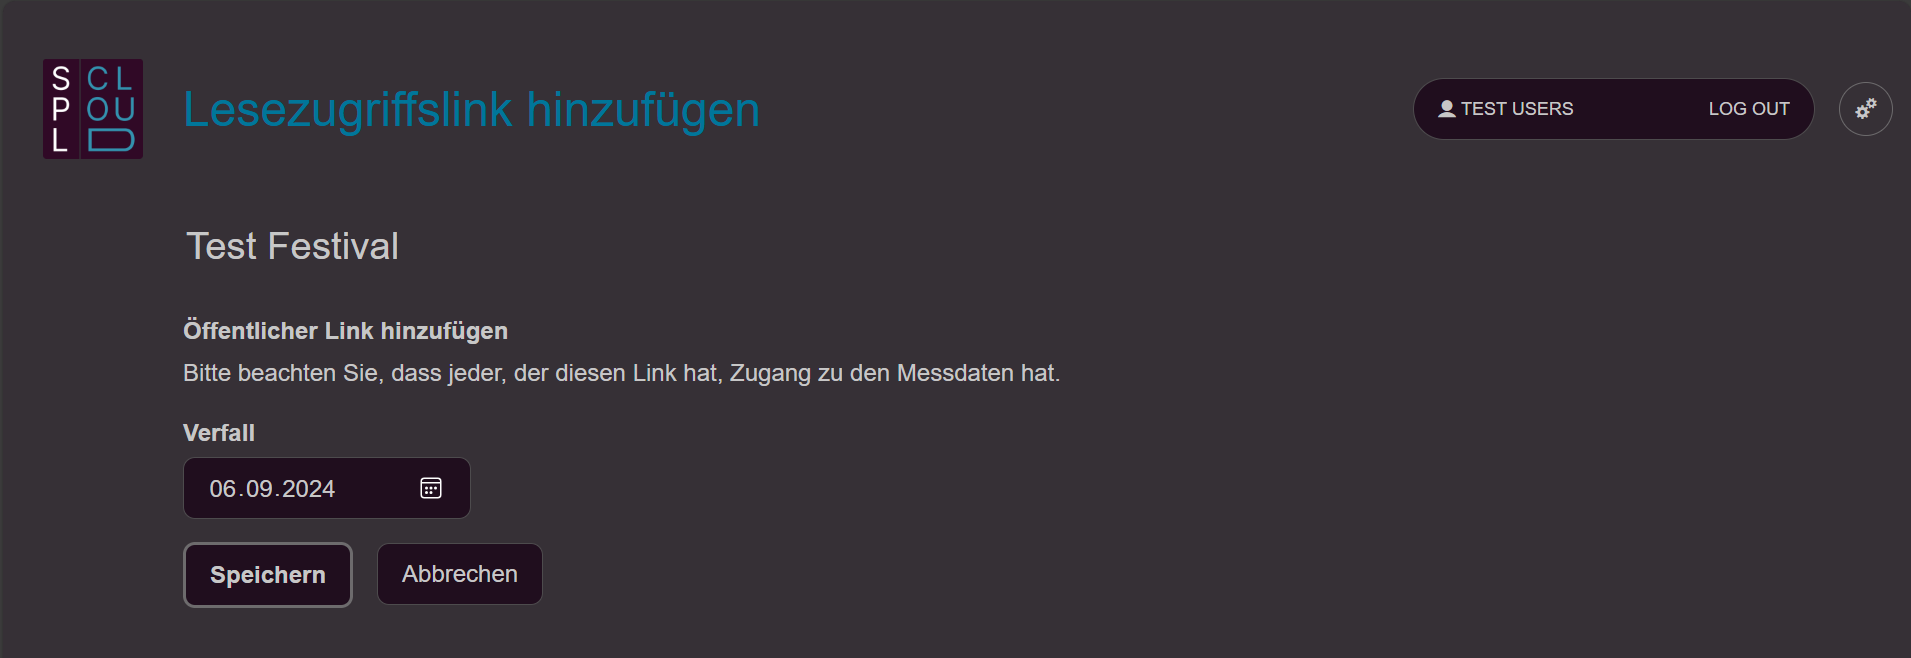
- Add access link: Enter an expiry date for the public read access. We recommend setting the date to approximately 10 days after the end of the event. You can then choose whether access should be to the individual measurement or the entire measurement assignment.

- Copy link or QR code: The generated link can be copied and pasted into an email, for example. The QR code can be printed as an image and displayed in the festival’s production office. Anyone with access to the QR code or the link can access the measurement assignment directly without logging in.