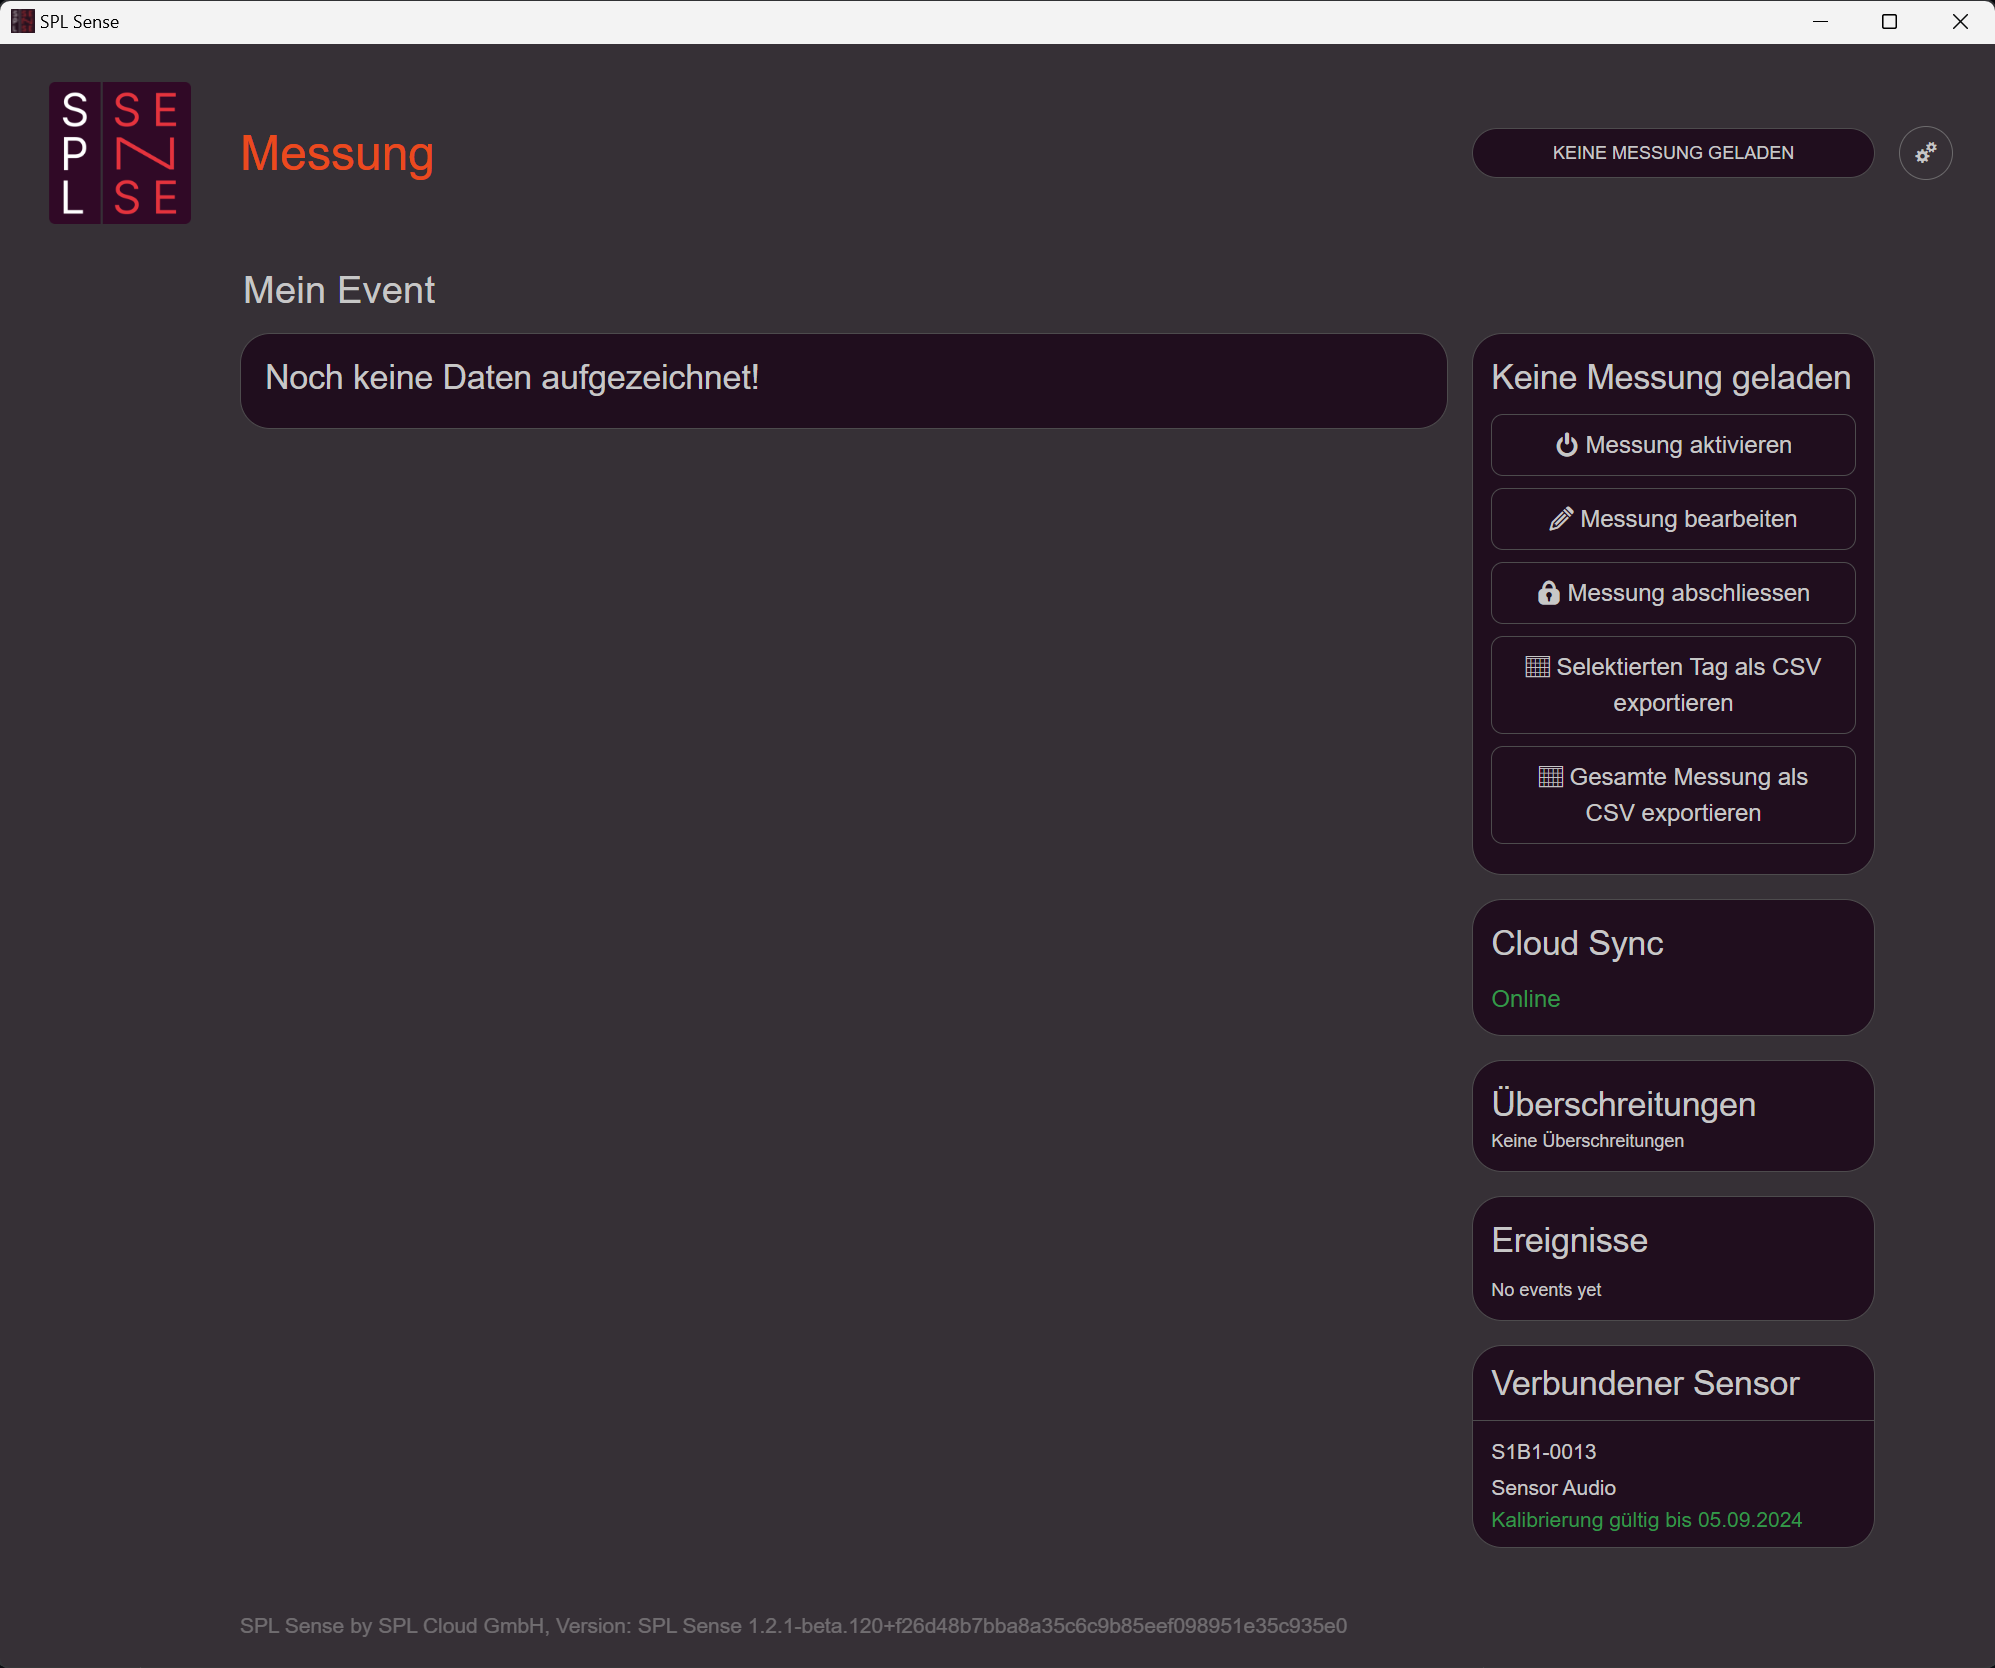
Dashboard overview
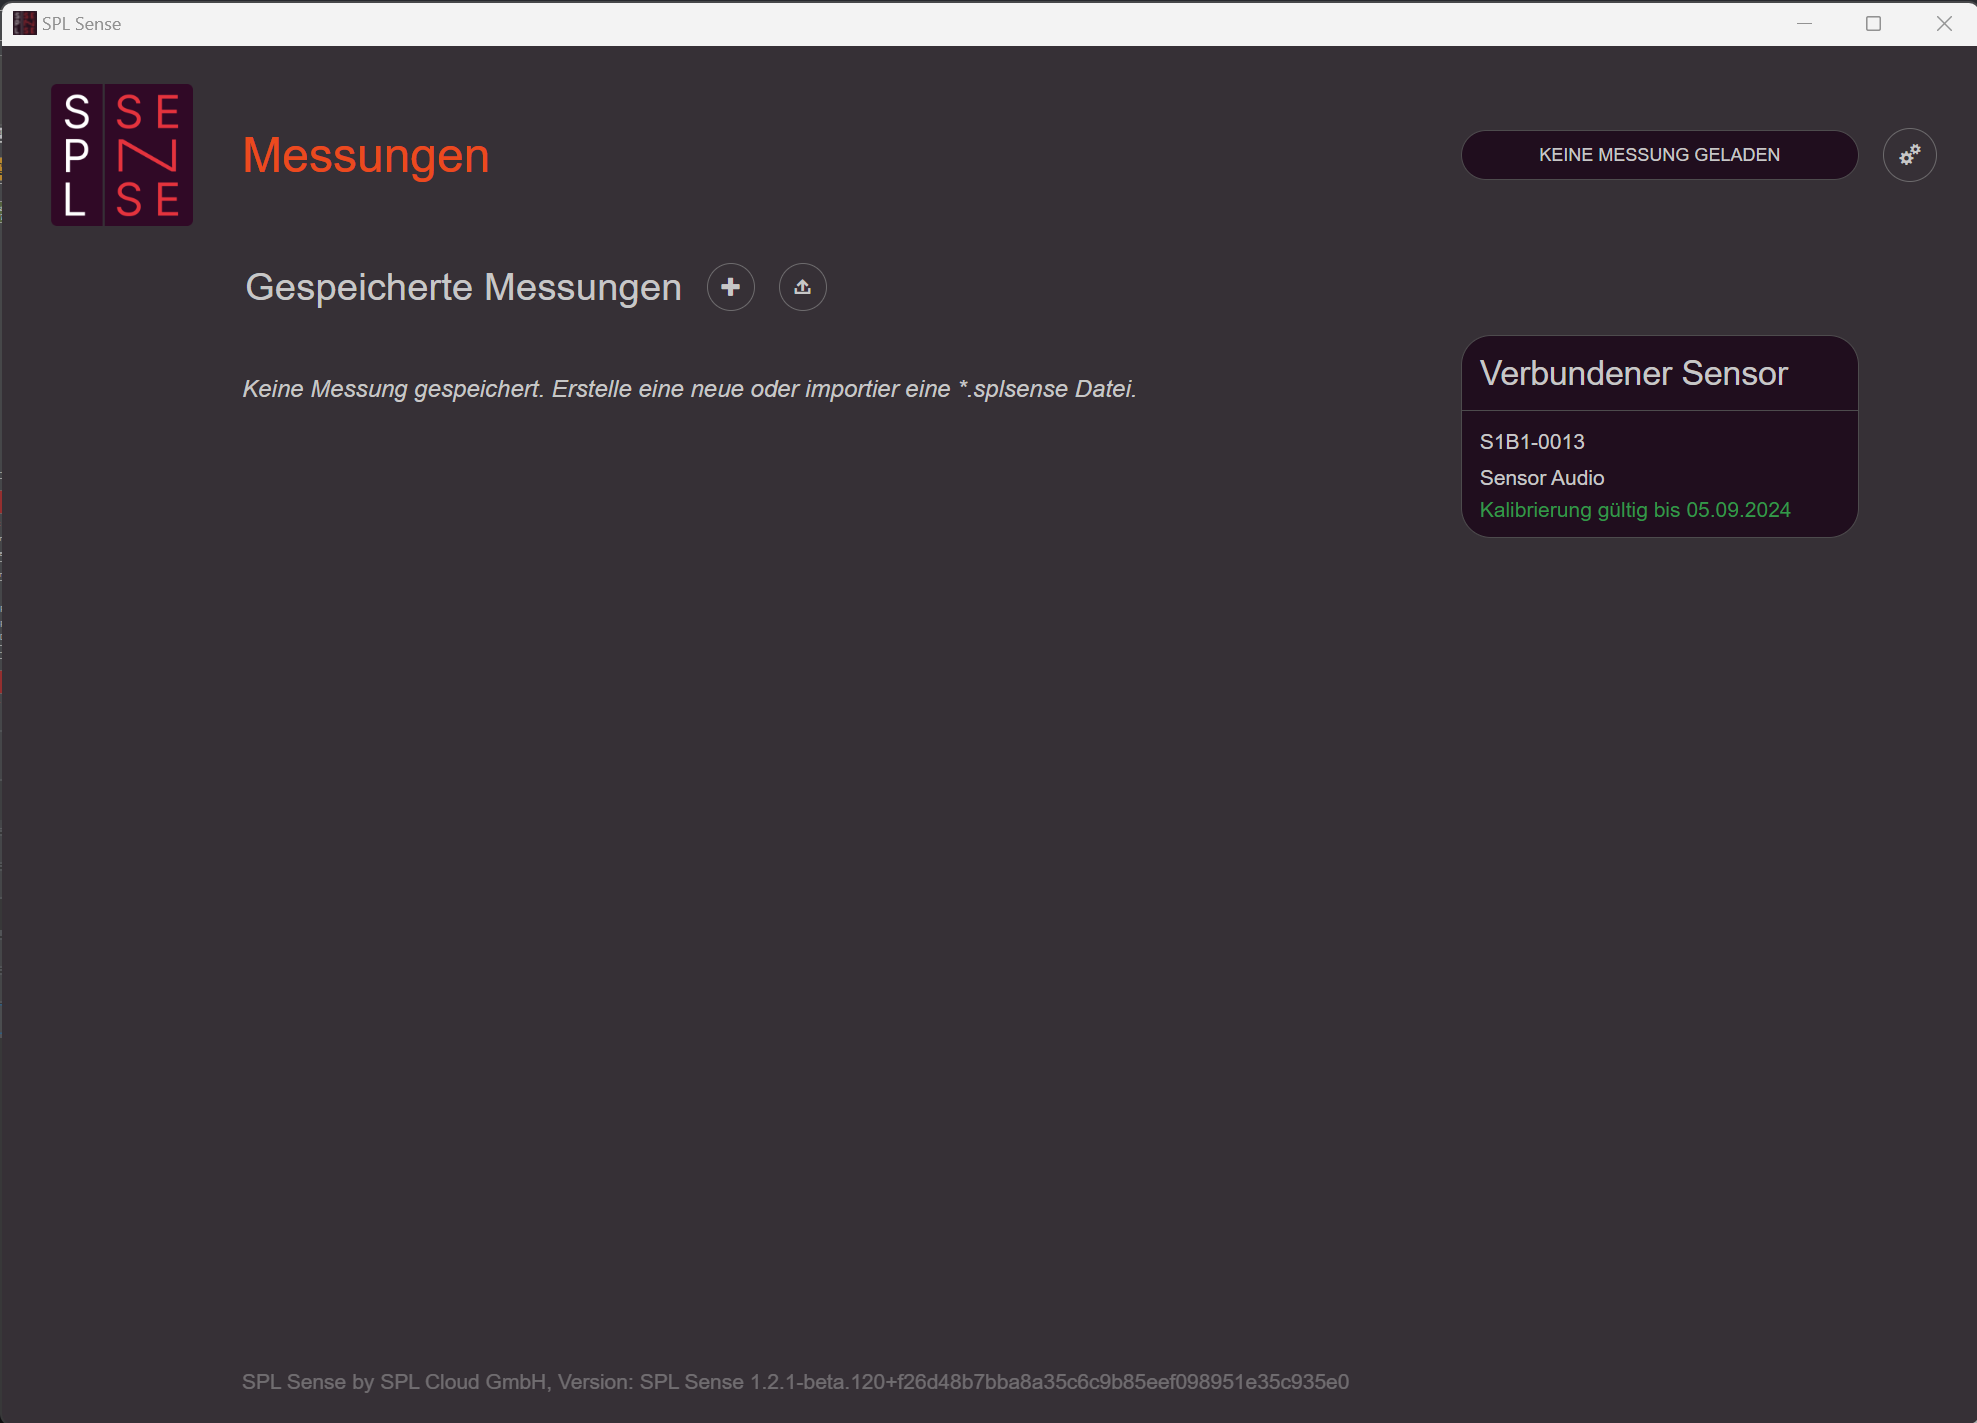
• Logo in the top left corner: Clicking the logo takes you back to the dashboard.
• Status indicator (top right): Shows the current status (no measurement loaded / measurement stopped / measurement running).
• Settings (gear icon, top right): Opens the settings.
• Create new measurement: Click the «+» button next to “Saved measurements” to create a new measurement.
• View connected sensor: The connected measurement sensor is displayed on the right side. Clicking on it shows the detailed status of the sensor.
Sensor status / Settings
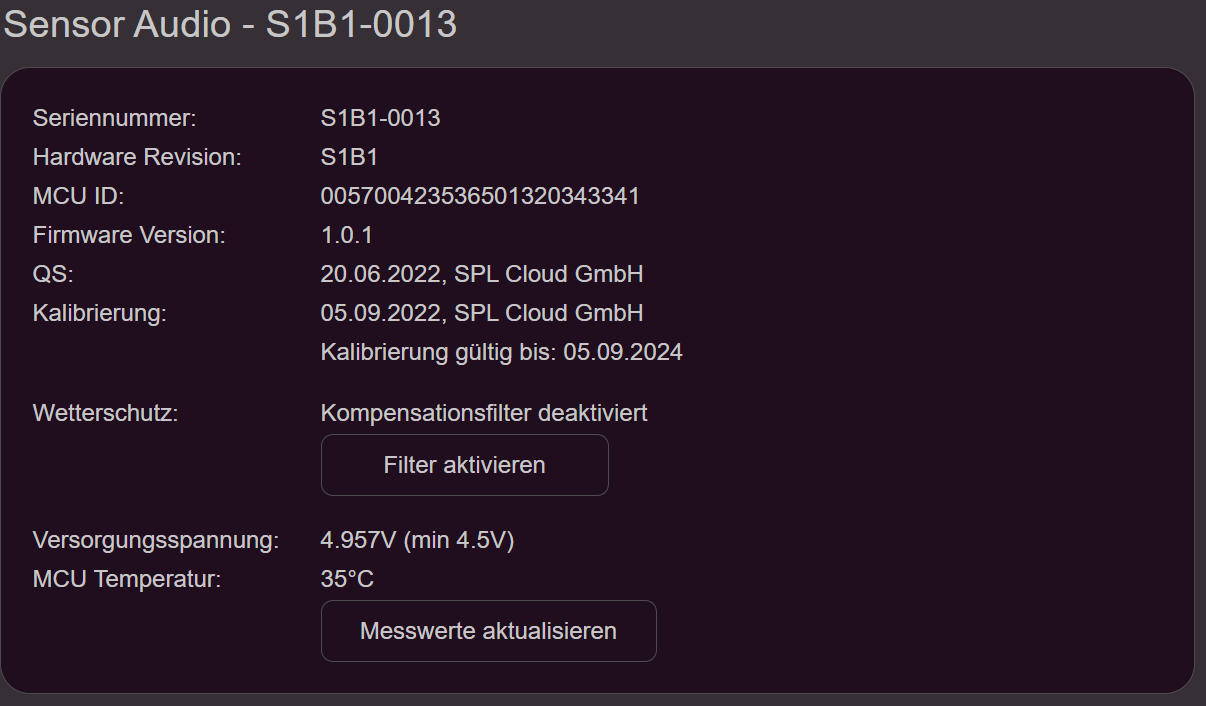
In the sensor detail screen, you can enable compensation for the weather protection. When this option is active, the weather protection is compensated by a FIR filter in the sensor.
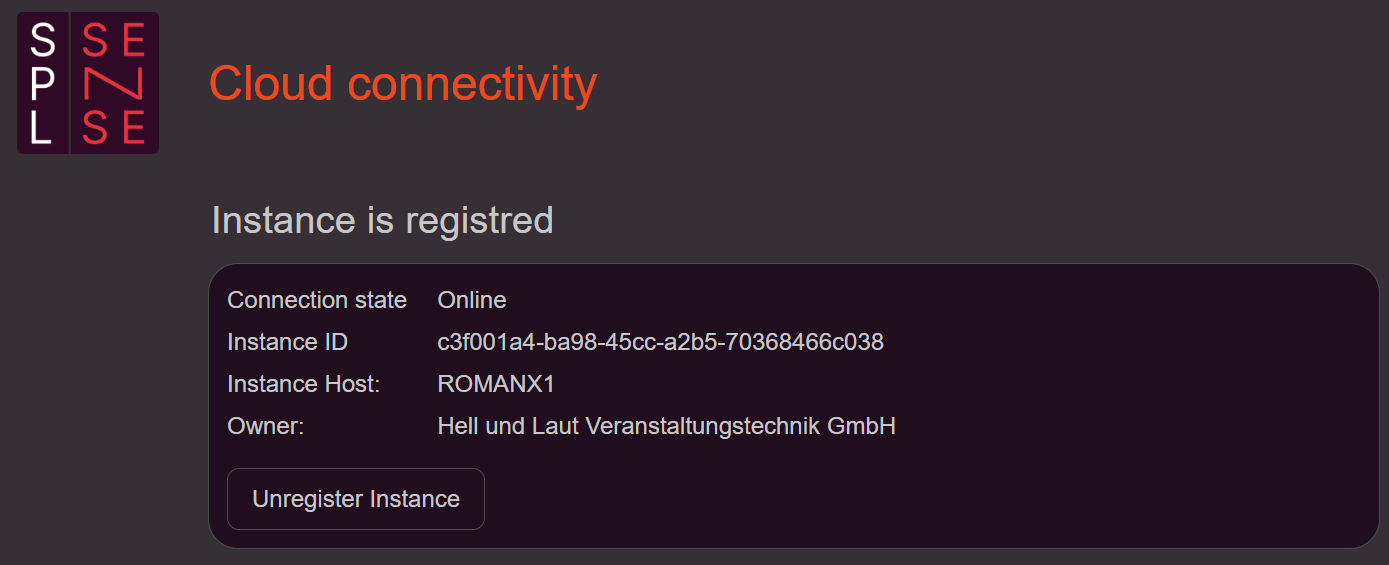
Connect to SPL Cloud (optional)
Every SPL Sense can be connected to the SPL Cloud to view and store data in real time.
- Open settings: Click the gear icon in the top right.
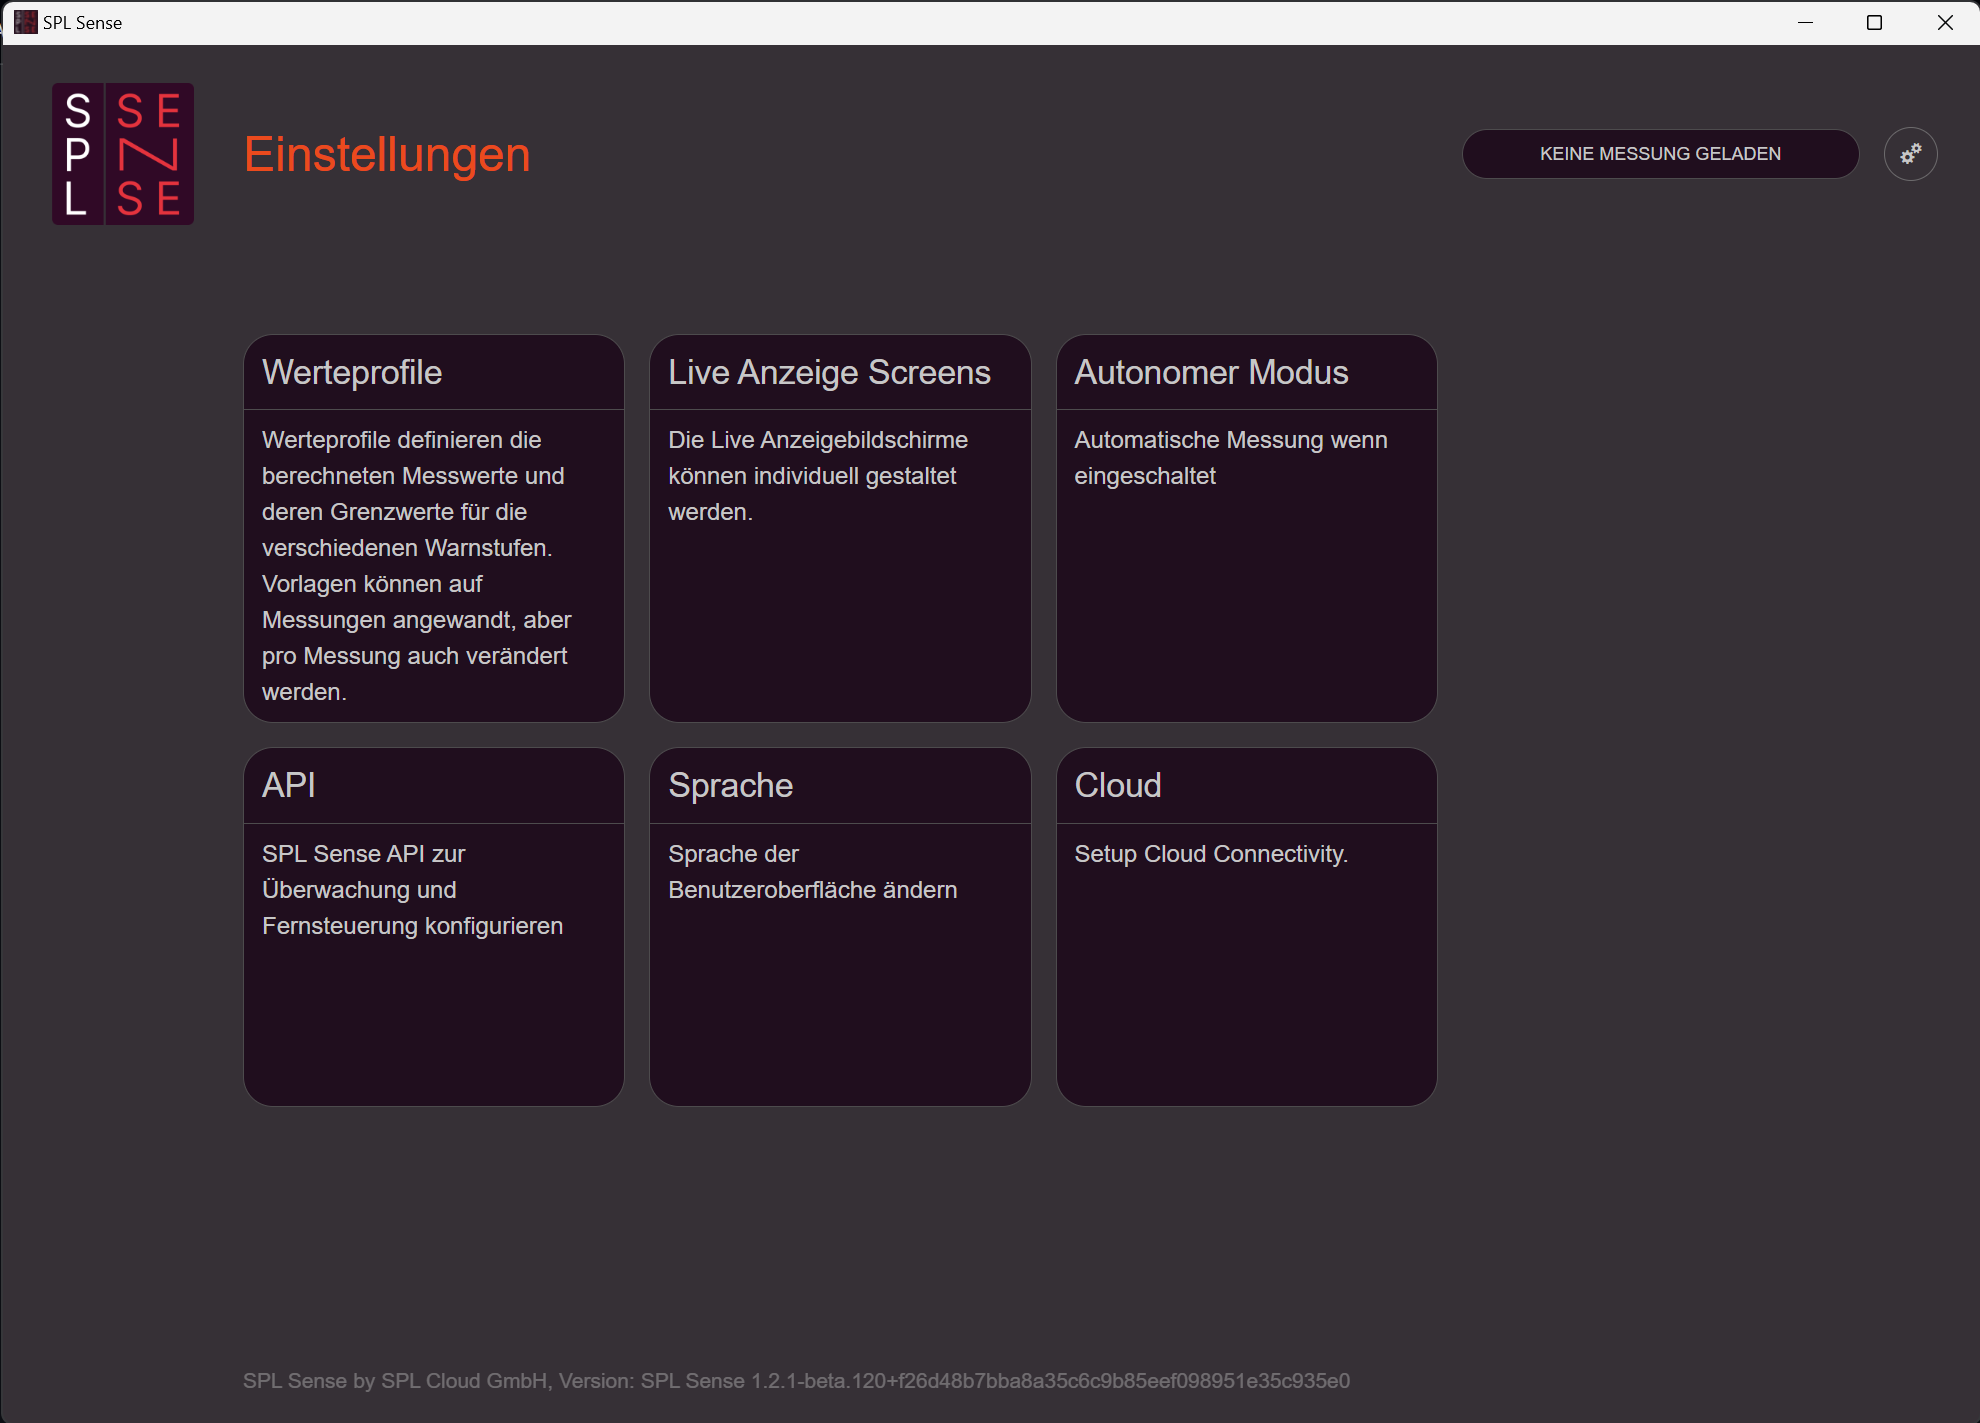
- Select Cloud: Choose the «Cloud» option.
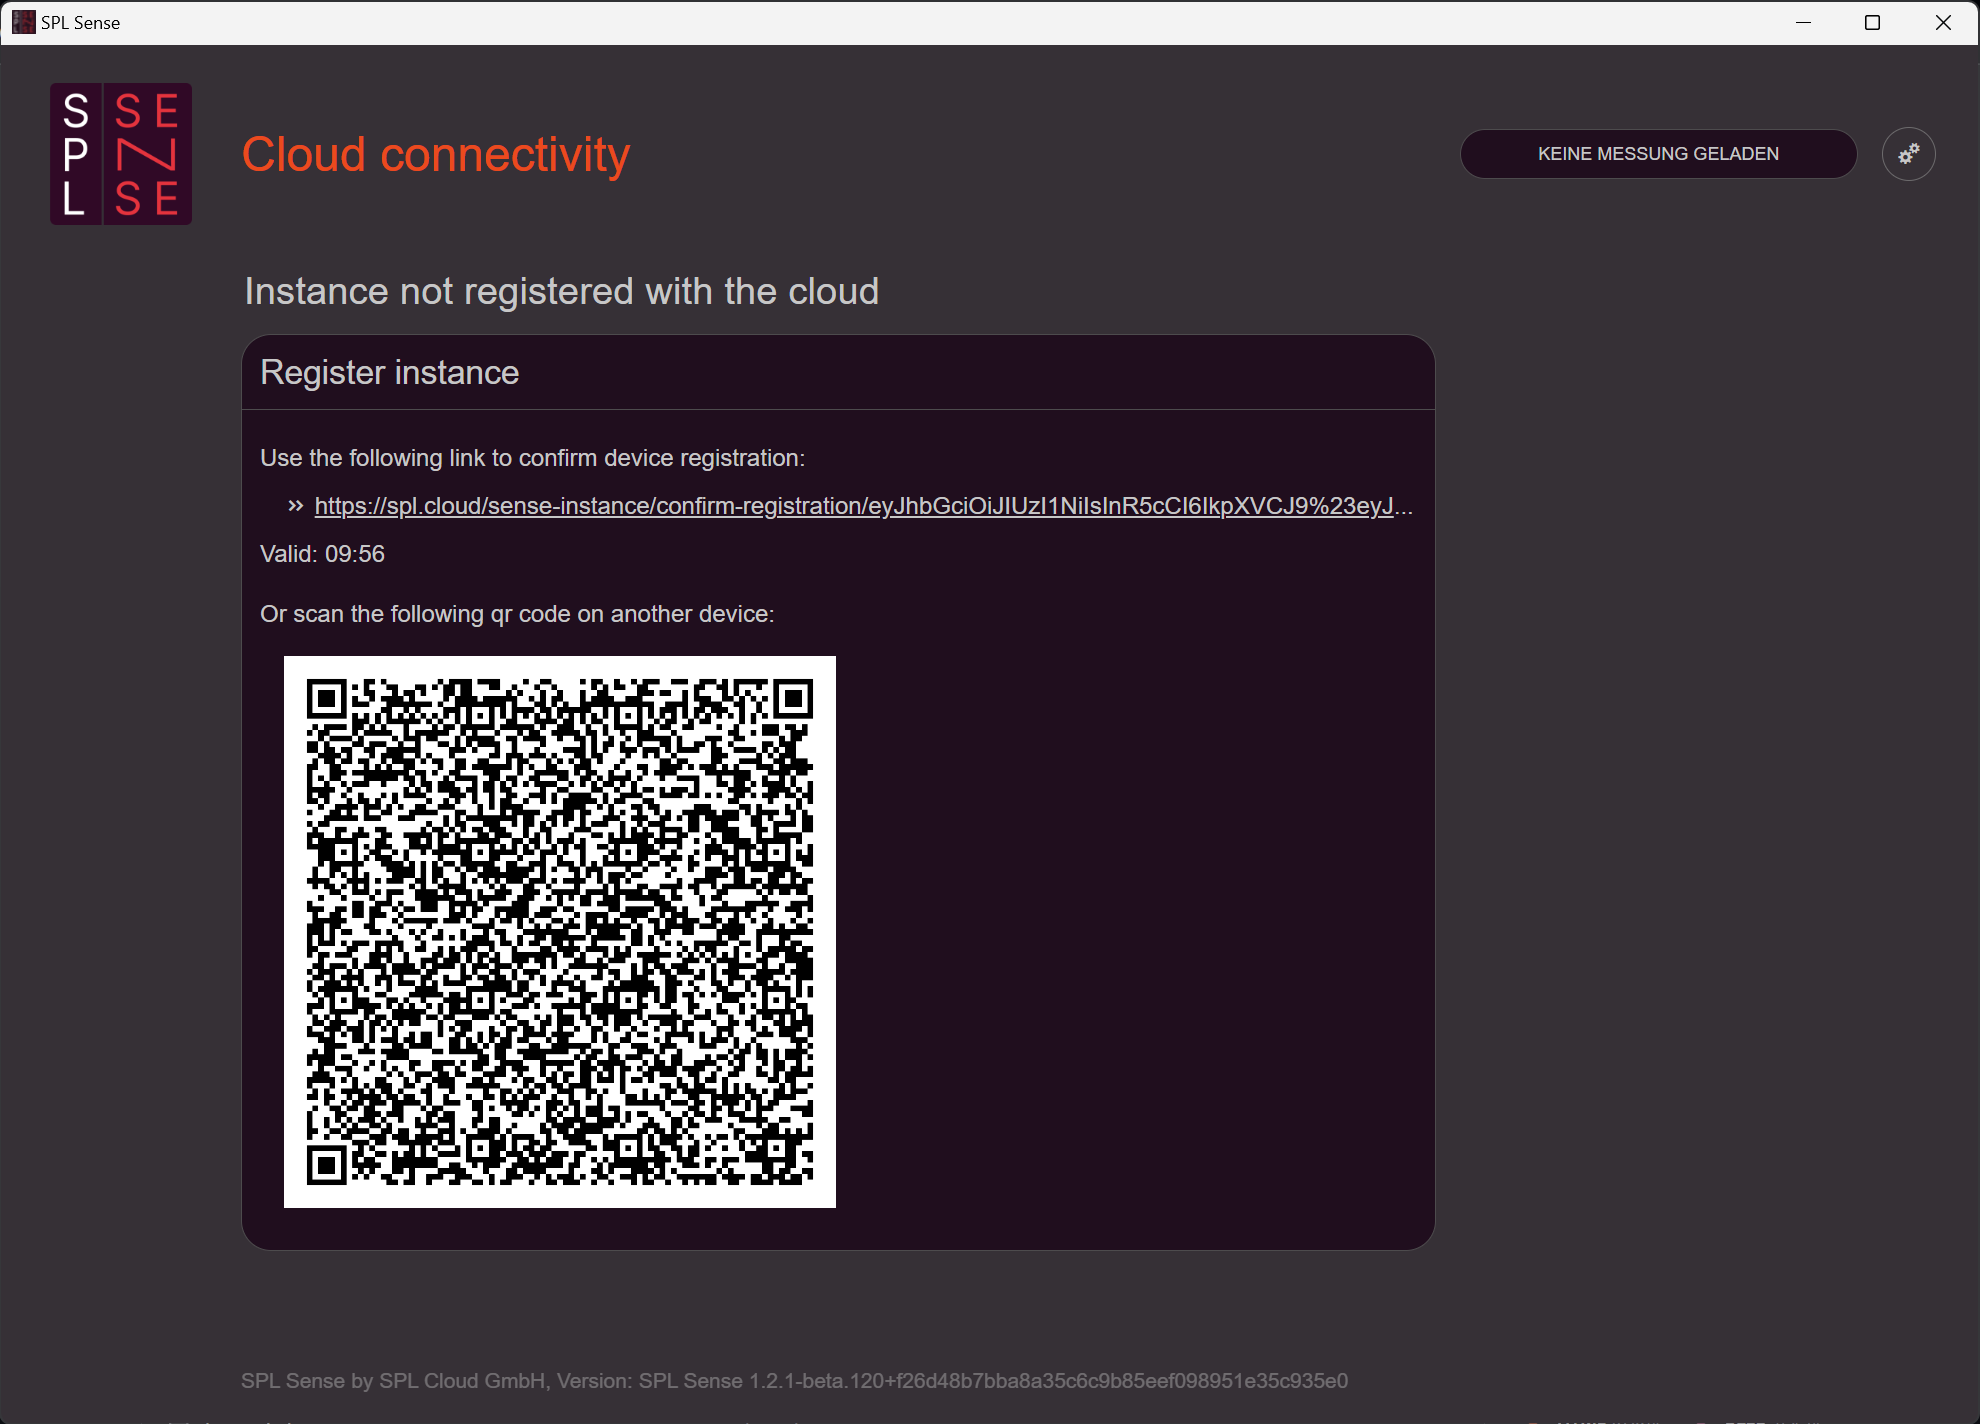
- Establish connection: Click the link or scan the QR code. (SPL Sense must be connected to the internet, and a personal SPL Cloud account must be created.)
After completing these steps, SPL Sense is connected to the SPL Cloud.
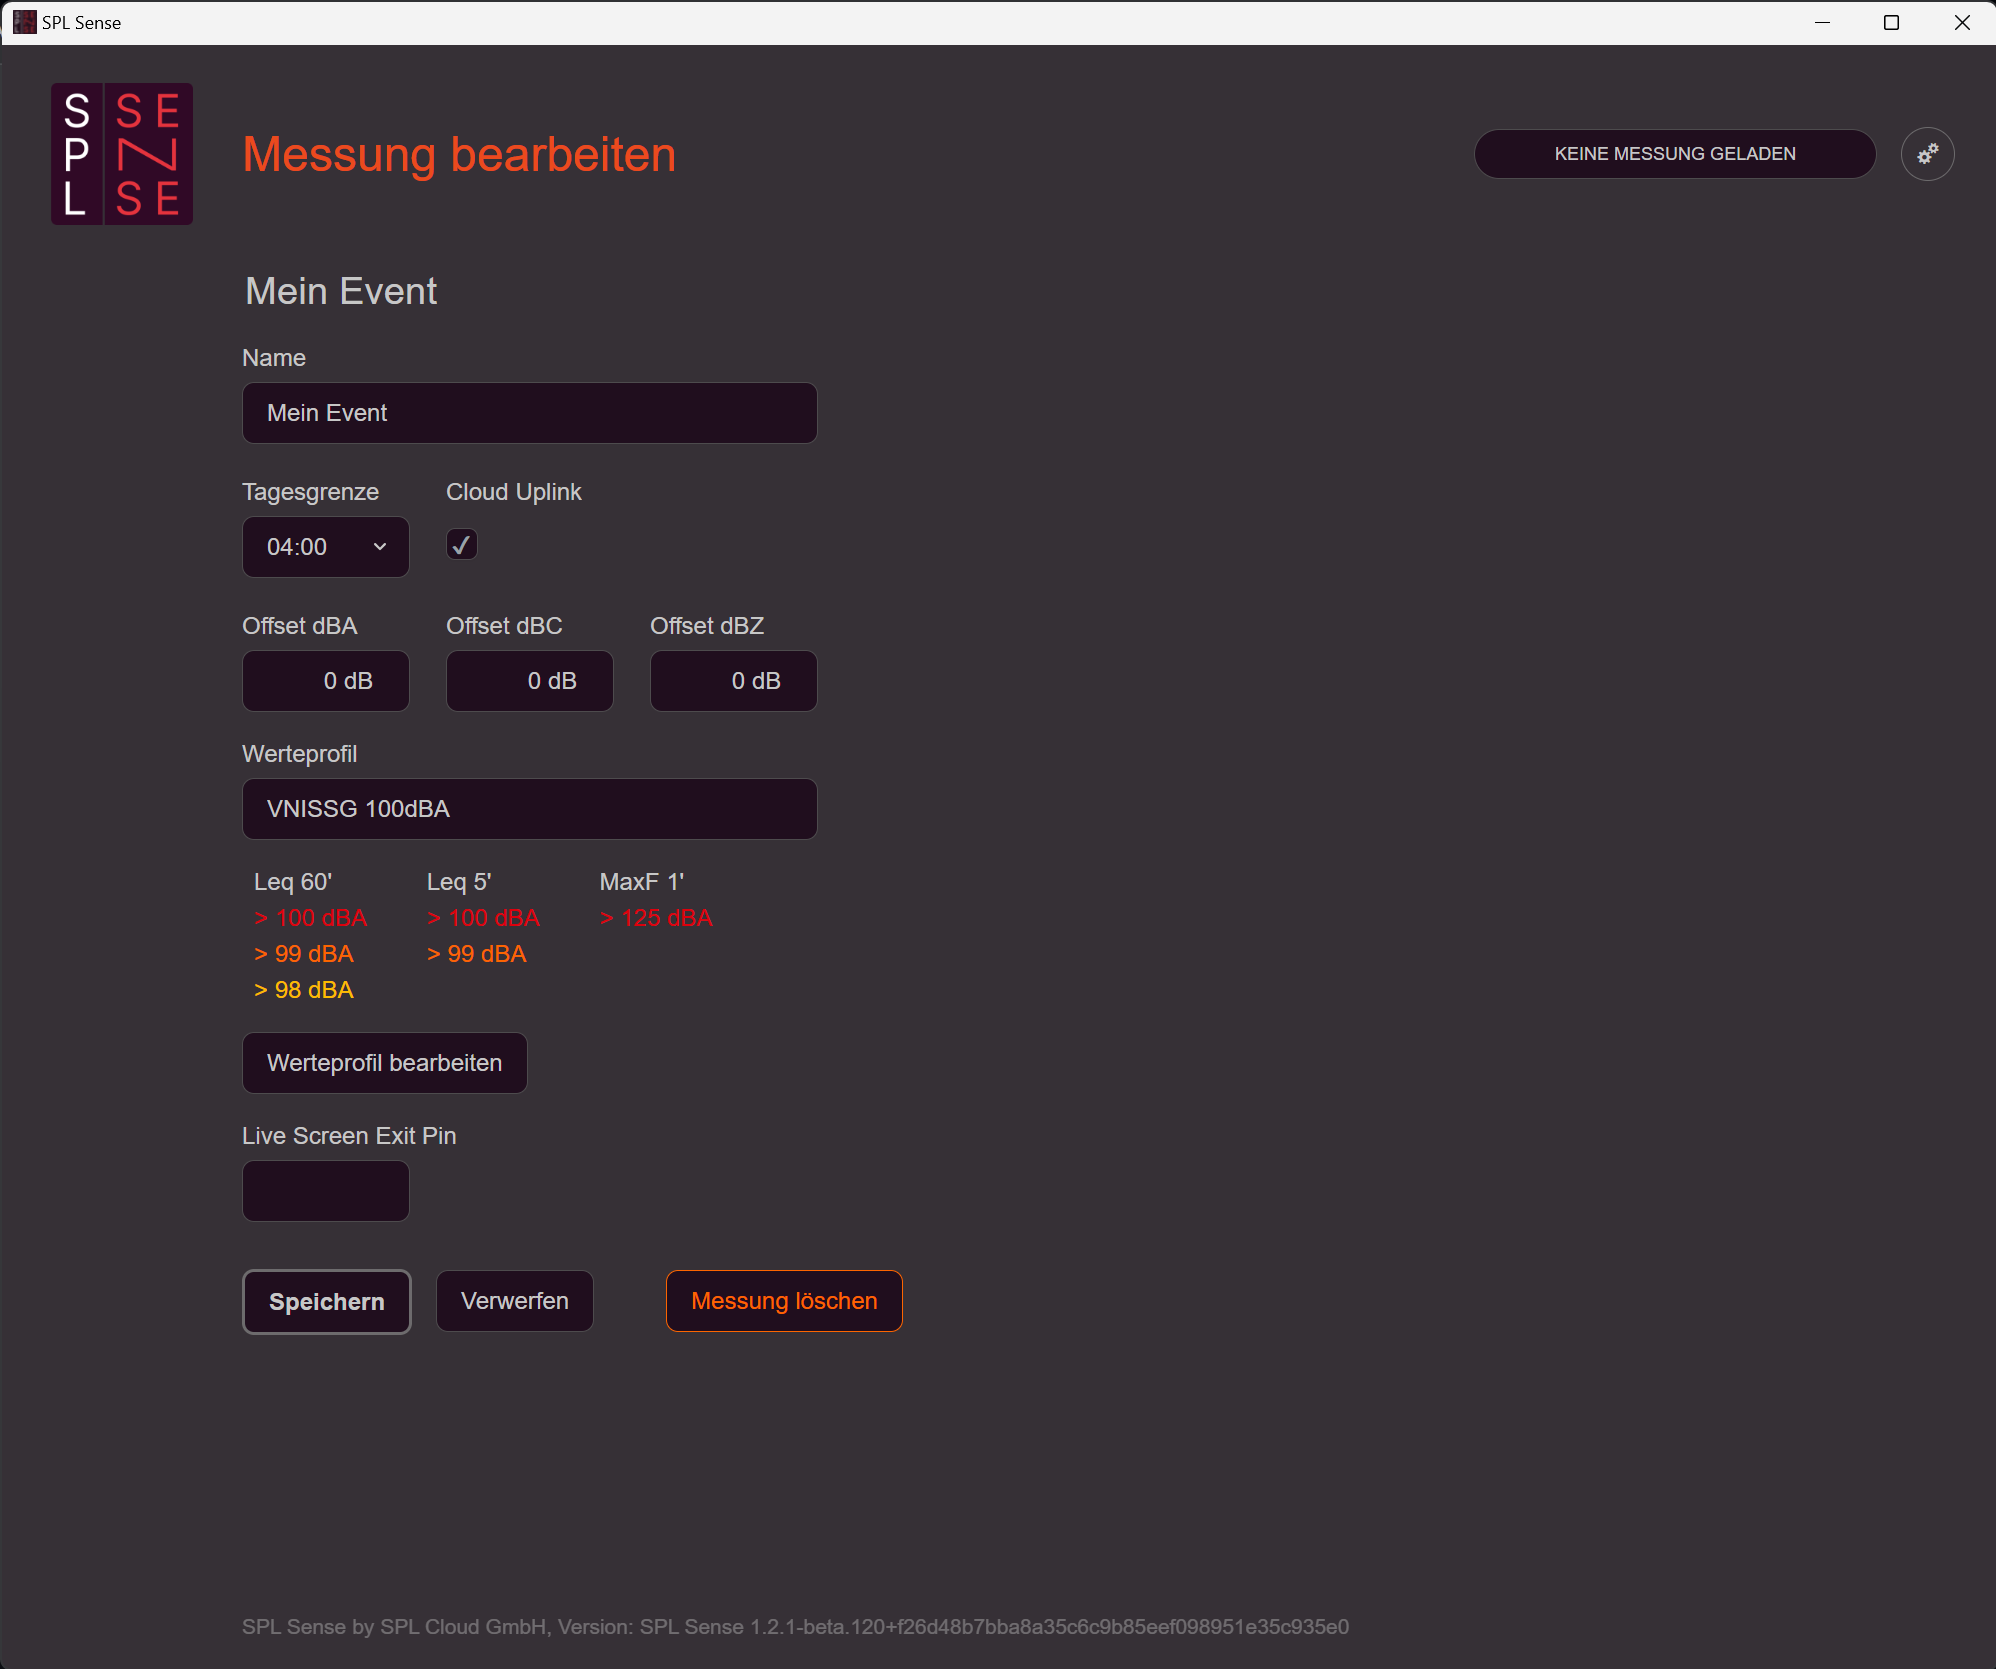
Create a measurement
- Create new measurement: Click the «+» button next to «Saved measurements».
- Enter name: Enter a name for the measurement. This name will later be displayed as the measurement heading.
- Set day boundary: Set the day boundary. This can be shifted from midnight up to 06:00 in the morning. This way, a concert or party is shown in a single day view rather than being split across two days by the midnight changeover. We recommend setting the boundary approximately 2 hours after the expected end of the event.
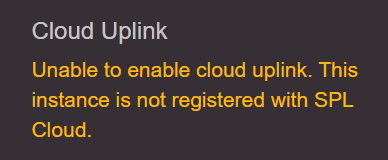
- Enable cloud uplink: Enable the cloud uplink to transfer this measurement to the cloud. This option is only available if SPL Sense is connected to the SPL Cloud. If no connection exists, this will be indicated accordingly.
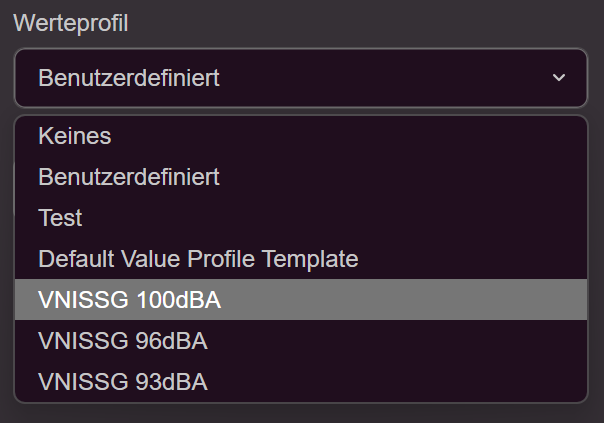
- Select value profile: Choose a value profile that defines which values are recorded with which filters (A/C/Z) and which integration times. Limit values for three different levels (notification, warning, limit) can also be set. The event log is sorted according to these levels. In addition to the pre-stored profiles based on the V-NISSG, you can also create your own profiles.
- Save measurement: Save the measurement.
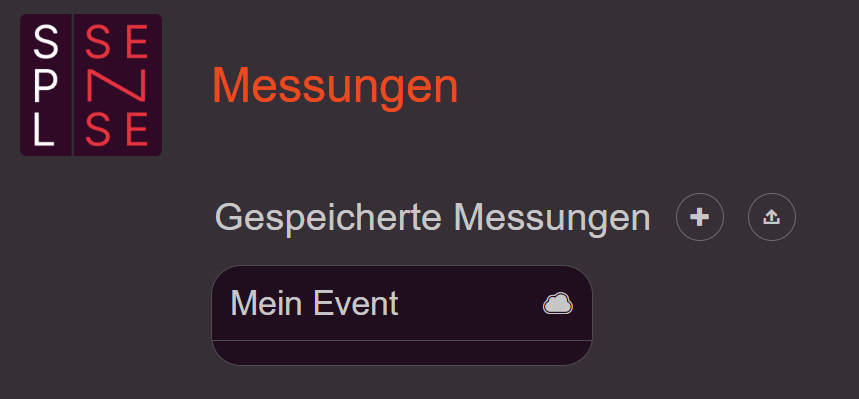
After saving, the measurement appears on the dashboard. A cloud icon next to the measurement heading indicates whether the measurement is being transferred to the SPL Cloud.
Open and edit a measurement
- Open measurement: Click on the desired measurement in the dashboard to open it.
- Activate measurement: Activate the measurement using the button on the right side. Note that only one measurement can be active at a time.

- Adjust basic settings: Under «Edit measurement» on the right side, the basic settings of the measurement can be adjusted. In addition to the parameters already mentioned, offsets can be set here and a PIN for exiting the live screen can be entered. It is also possible to permanently delete the measurement along with all its data from the computer.
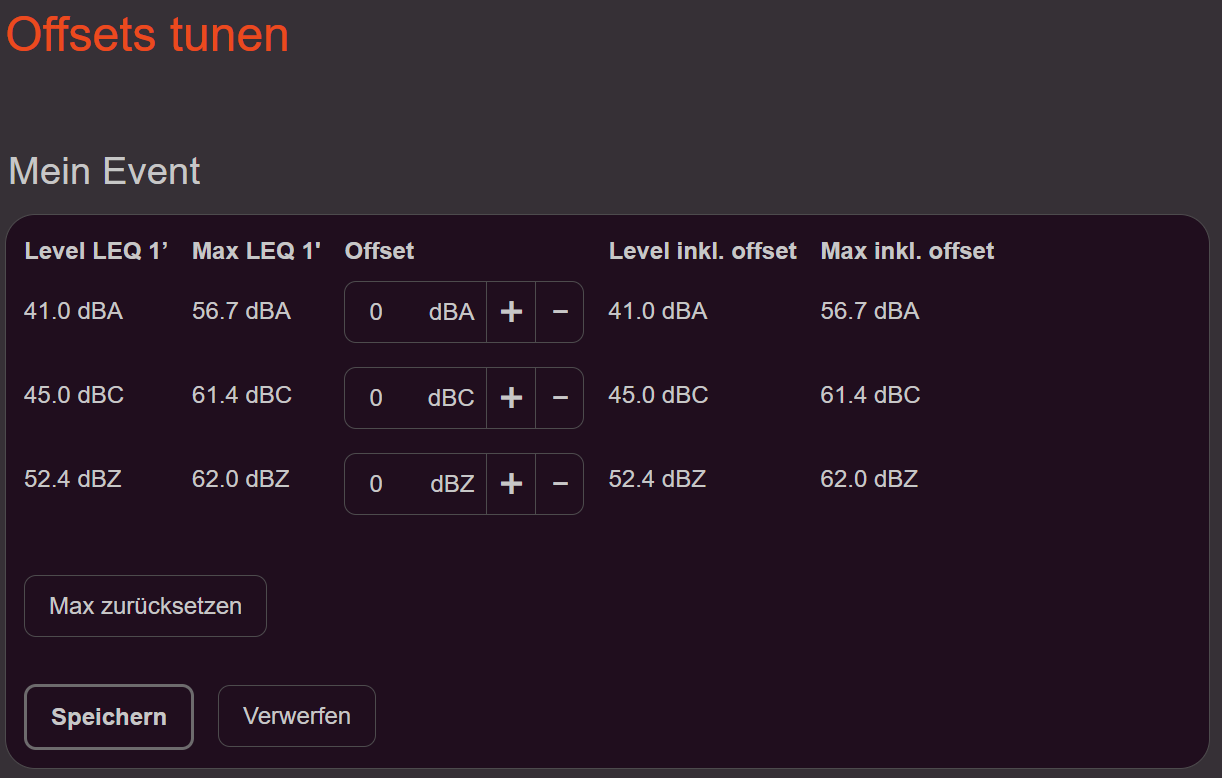
Offset tune
The offset can be set using the «Offset tune» function on the right side. All readings captured during this process are not saved to the measurement. We recommend setting the offset (the level difference between the loudest point and the sensor location during the measurement) using a test signal, e.g. pink noise, as follows:
- Play pink noise: Use a volume level expected during the concert or event.
- Reset maximum value: Press the «Reset max» button.
- Walk through the audience area: Move through the audience area with the computer and sensor.
- Place sensor: Set up the sensor at the designated measurement position.
- Adjust offset: Adjust the offset value so that the «Level incl. offset» matches the «Max LEQ1».
- Save settings: Save the adjustments made.
Alternatively, the level difference can also be determined using an additional handheld measurement device. Further information on sensor placement and offset can be found at: Industry recommendation for measurement procedures
Leveler plugin for the audio processor
The plugin for the audio processor can be downloaded from the website under «SPL Sense Leveler». After inserting it into the audio processor design, the IP address of the computer running SPL Sense, as well as the port and API key, must be entered in the plugin. When the inputs are correct, the plugin displays the current status and readings from SPL Sense. In SPL Sense, the mode «External leveler only» or «Full access» must be enabled under «Settings» - «API». The API key can also be configured there.
Important: For a functioning leveler with audience detection, no line level adjustments may be made between the plugin and the loudspeaker after calibration. Audio compressors or similar components must not be used in this signal path.
Leveler settings
A good sensor position and correctly set offsets for the A, C, and Z values are crucial for good leveler performance. A good sensor position means that the sound pressure level from the mid/high-frequency loudspeaker and the bass loudspeaker are in a natural ratio. The set offsets should generally be between -10 dB and +2 dB.
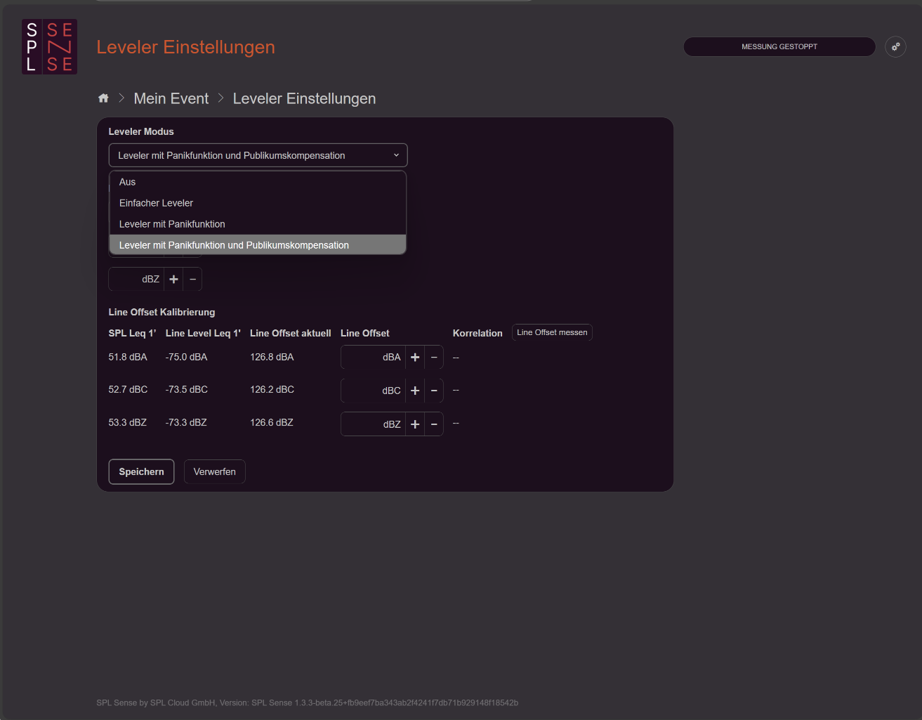
- Open leveler settings: Open the settings panel for the leveler. This is possible during a running or stopped measurement. For initial setup, the measurement should be stopped.
- Select leveler mode: Choose between «Off» (leveler inactive), «Simple leveler» (leveler always regulates slowly – audience not taken into account), «Leveler with panic function» (in the event of a rapid sound pressure level increase leading to an exceedance, the leveler quickly reduces the level – audience not taken into account), and «Leveler with panic function and audience compensation» (in the event of a rapid sound pressure level increase leading to an exceedance, the leveler quickly reduces the level – audience or other external noise sources are taken into account and filtered out).
- Set limit values: Enter the desired limits. The leveler can simultaneously consider a limit for the A, C, and Z weightings. Limits can be adjusted at any time, even during a running measurement.
Steps 4 and 5 are only required for the mode with audience compensation.
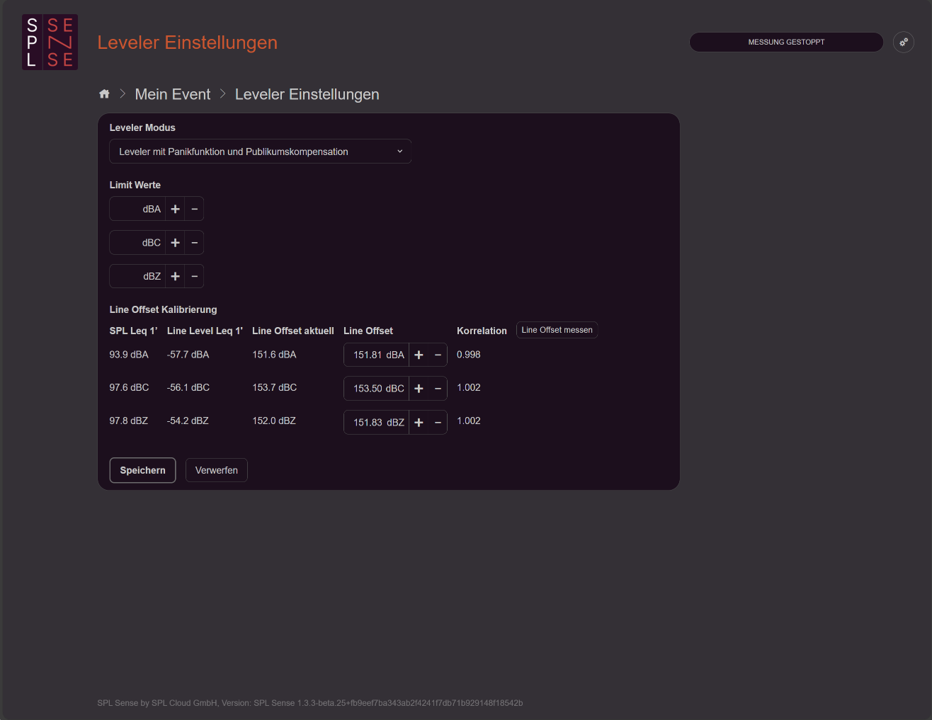
- Play pink noise: Feed pink noise as an audio source at the expected level. Use the actual signal chain — if a DJ mixer is the source, feed a pink noise generator through the DJ. If the limit during the event is 96 dB, measure at 96 dB as well.
- Measure line offset: Press the «Measure line offset» button. The system will determine the line offset over 3 seconds, measuring the ratio between the line level and the sound pressure level. There must be no interference noise during this short period. The process can be repeated as many times as needed. Once the measurement is complete, the correlation value for the A, C, and Z weightings should be as close to 1.000 as possible.
- Save: Confirm the settings with «Save».
During a running measurement, limits and the line offset can be adjusted manually. The automatic calibration process is only possible when the measurement is stopped. The correlation indicates whether the setting is correct. In the absence of external noise, the value should be as close to 1 as possible. When making manual corrections, extreme caution is required. Even a small misconfiguration can cause the leveler to ignore external noise or to intervene too aggressively.
With correctly set line offsets, correlation values below 1 indicate a dampened sensor or manipulation of the loudspeaker system. Correlation values above 1 indicate external noise.
Start a measurement
- Start measurement: Start the measurement using the button on the right side.
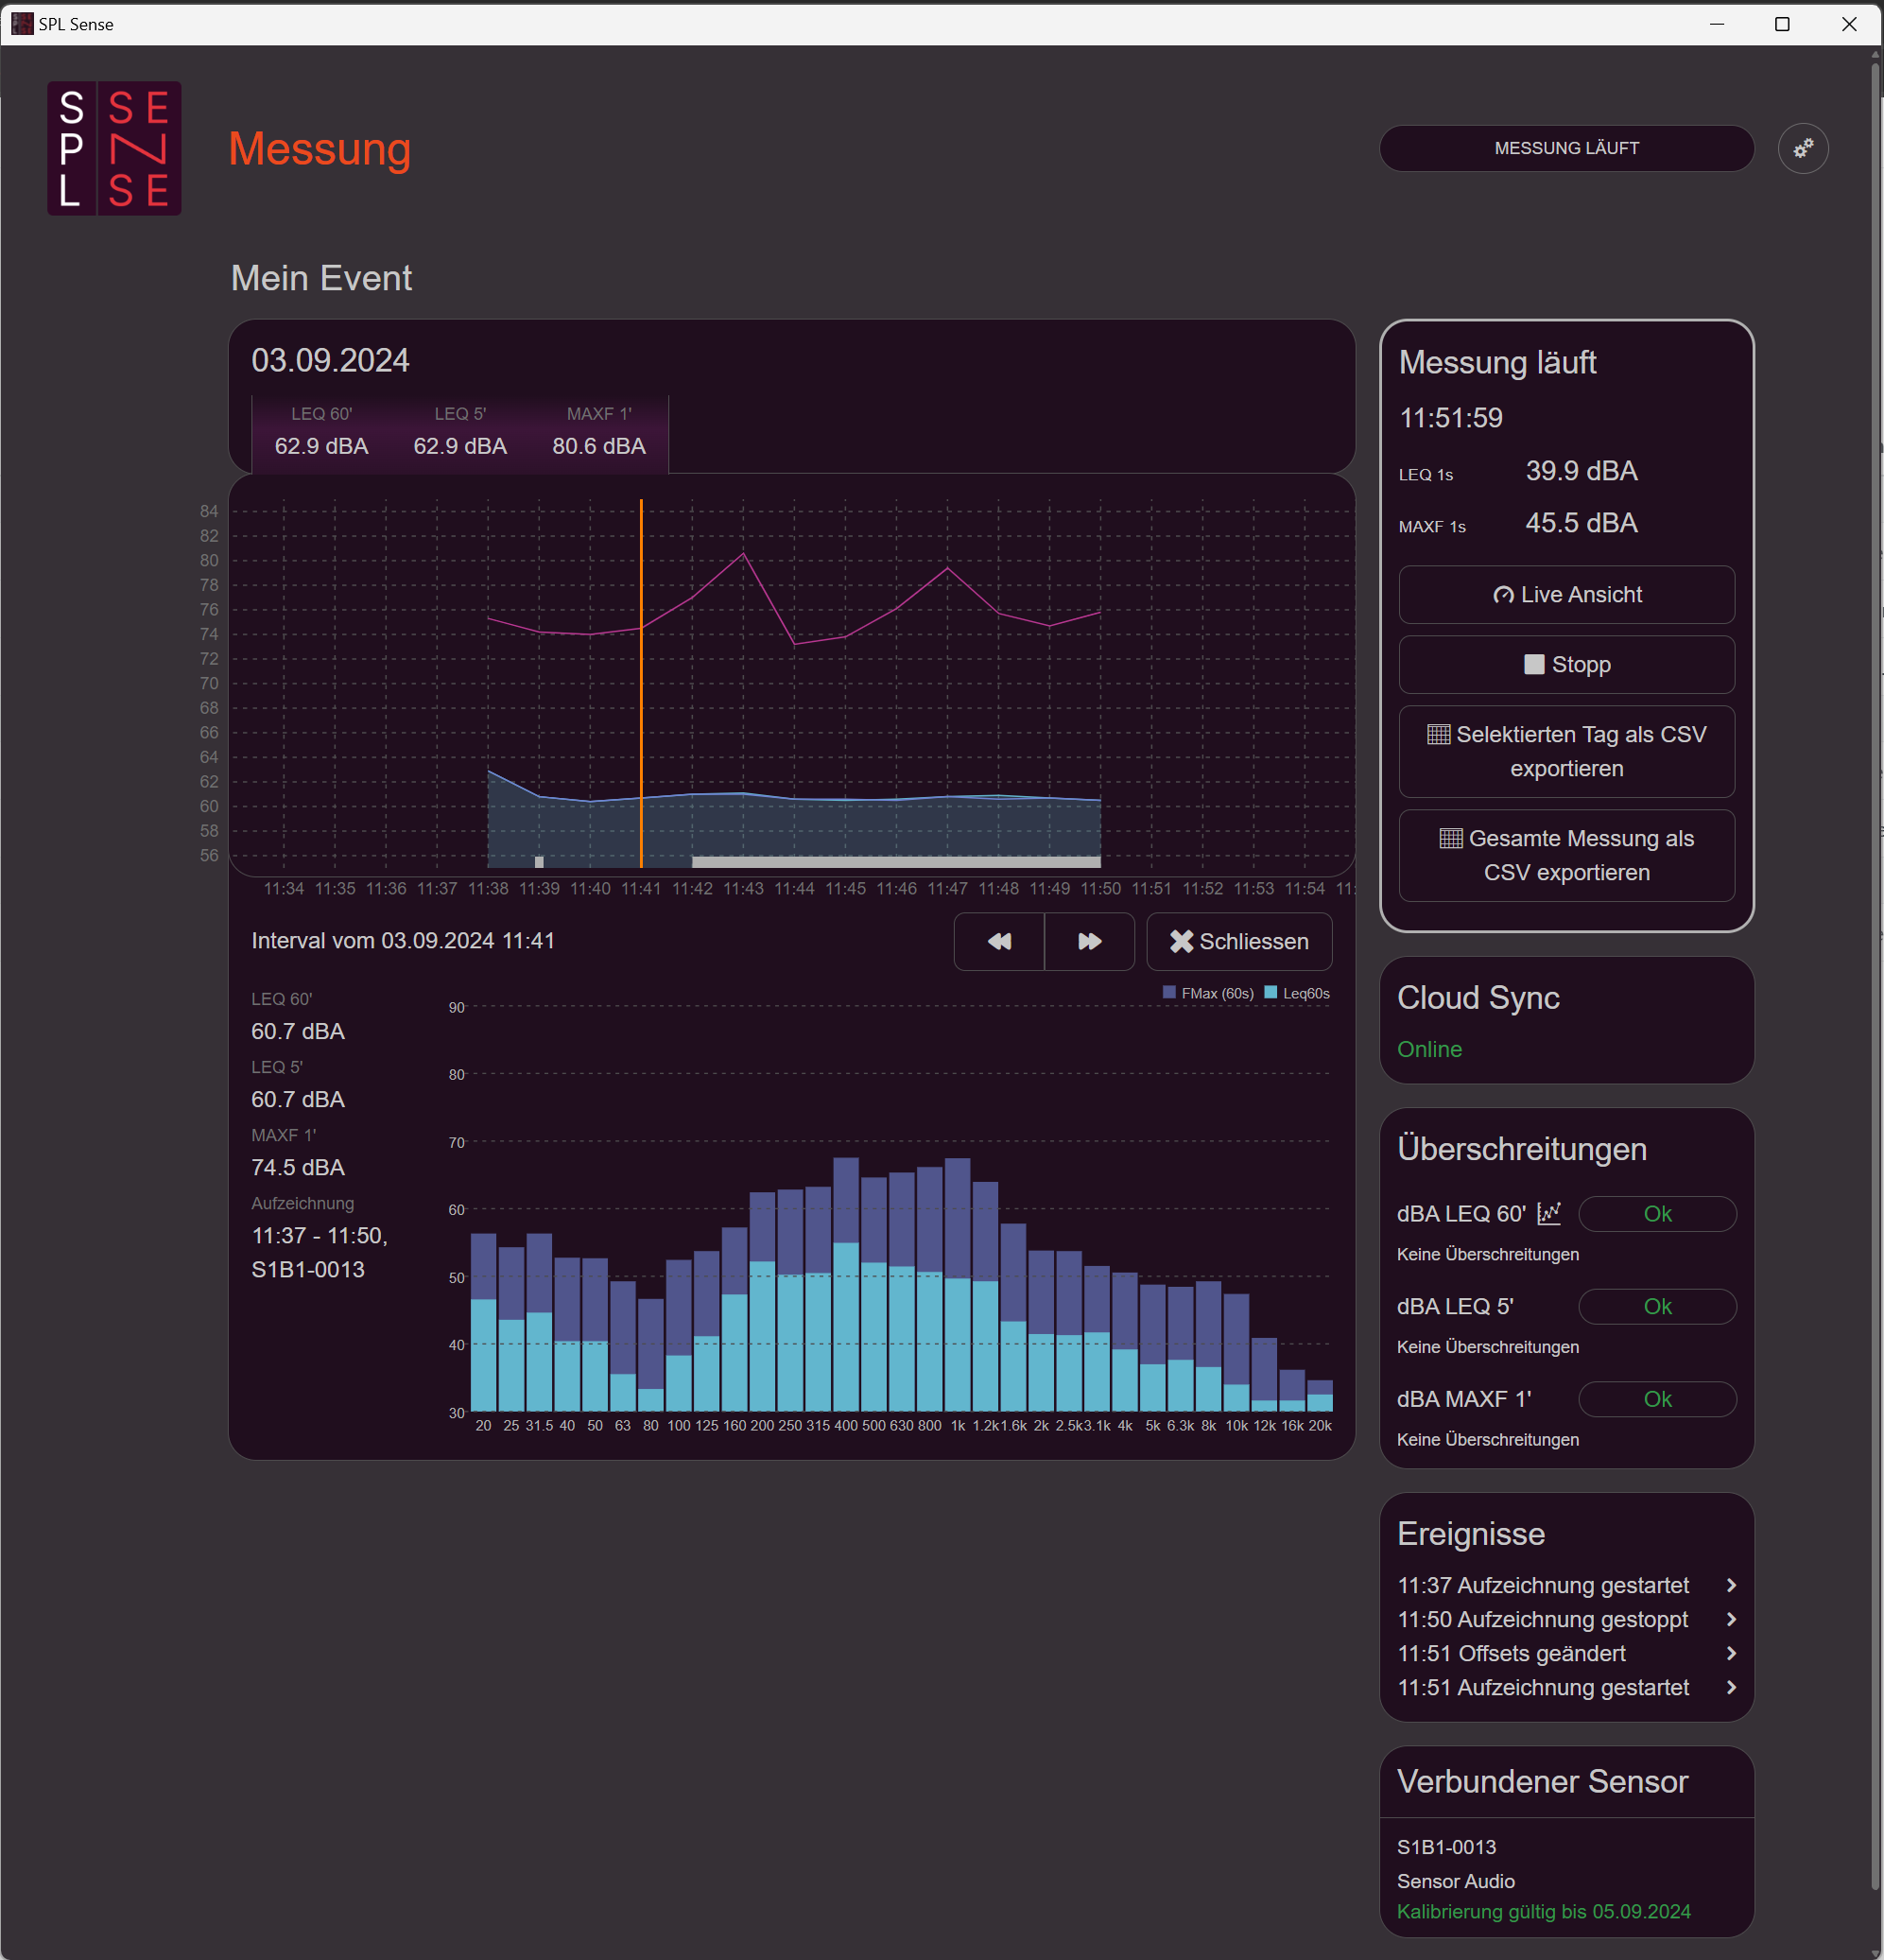
- Display current volume: The current volume level is also shown on the right side.
- Current leveler display: When the leveler is active, the current level reduction and SPL line correlations are shown during a running measurement. The value written in bold and marked with «>» indicates the weighting currently relevant for the leveler. For example, if the A correlation value is marked, the A-weighting limit is currently dominant for level reduction.
- Bypass leveler: The leveler can be bypassed at any time using «Bypass leveler». Pay attention to the current level reduction. If, for example, a level reduction of 15 dB is currently active, activating the bypass will raise the volume by 15 dB.
- Track volume history: A graph documents the volume level over time. Clicking on the graph shows additional details such as spectral data and any readings below or above the measurement range.
- Track leveler history: In the running measurement overview, in addition to the sound pressure level, the line signal level history (light brown) and the level reduction (red) are also displayed. The correlation is also visible. Alongside the per-minute average of level reduction and correlation, the minimum and maximum values as well as the spread are visualised.
- Cloud connection status: The connection status to the cloud is shown on the right side.
- Display exceedances: Under «Exceedances», level exceedances are listed according to the weightings and integration times defined in the value profile. Clicking on the individual categories displays the defined threshold values as yellow, orange, and red lines in the graph.
- Event log: In the «Events» section on the right side, actions such as starting and stopping the measurement, as well as offset adjustments and leveler events, are listed with their respective timestamps.
- Open live view: Clicking «Live view» on the right side opens the live view.
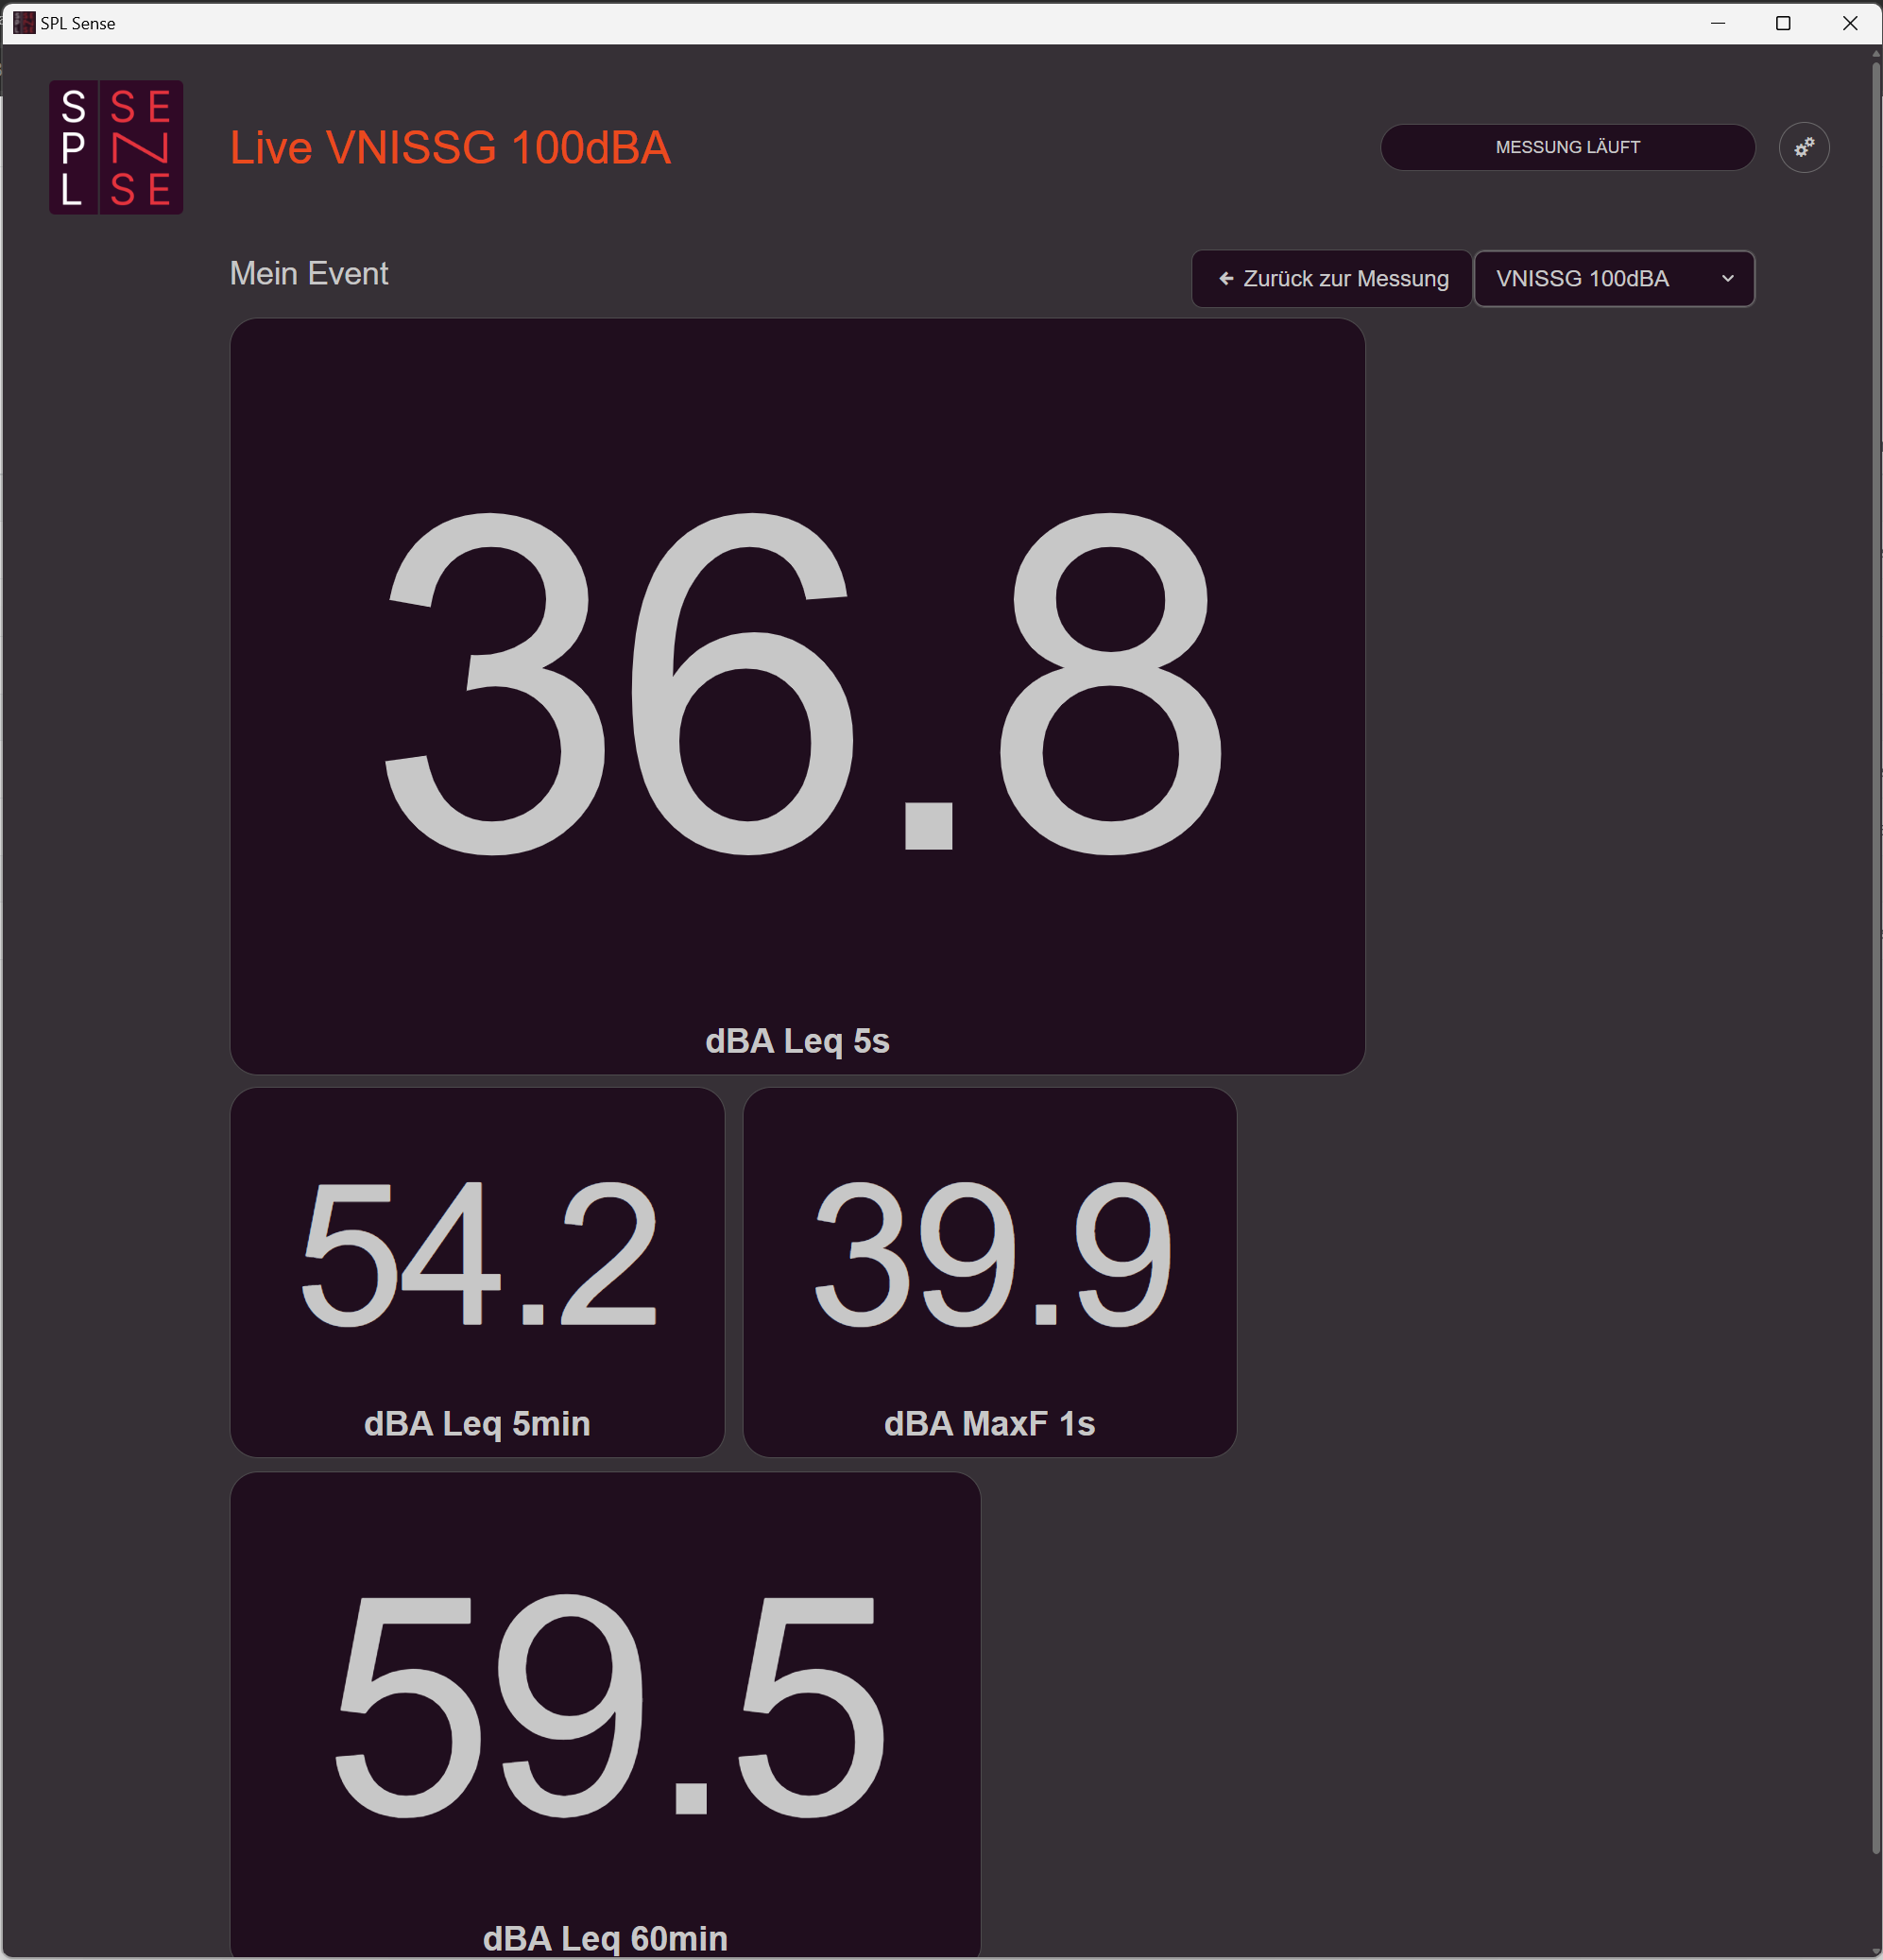
- Switch live views: In the top right you can switch between different live views. Custom live views can also be created. The live view provides a clear display of the desired readings during the event and is especially helpful for technicians or DJs.
- Return to measurement overview: To return to the measurement overview, click «Back to measurement». If a PIN for exiting the live view has been set under «Edit measurement», it will be requested here to ensure that only authorised persons can change the measurement settings.